Applying Coupons at POS
Overview
This article explains how to set up a coupon in iVendNext using the following scenario:
Scenario:
| S No | Section | Details |
| 1 | Details | Name: Festive Coupon Description: 10% off on Bags |
| 2 | Setup | Effective Time: Daily from 3:00 PM – 9:00 PM |
| 3 | Applicability | Coupon is applicable on Bags in the Alpha Store |
| 4 | Exclusion | Coupon is Not applicable in the Delta Store |
| Store(s) | Offer | Validity (Daily) | Exclusion |
|---|---|---|---|
| Alpha Store | 10% off on Bags | 9:00 AM – 9:00 PM | — |
| Delta Store | — | — | Not Applicable |
-
Two stores: Alpha Store and Delta Store.
-
Offer: 10% off on Bags.
-
Validity: Everyday between 9:00 AM – 9:00 PM.
-
Exclusion: Not valid in the Delta Store.
Creating a Coupon
Follow these steps to create a coupon in iVendNext.
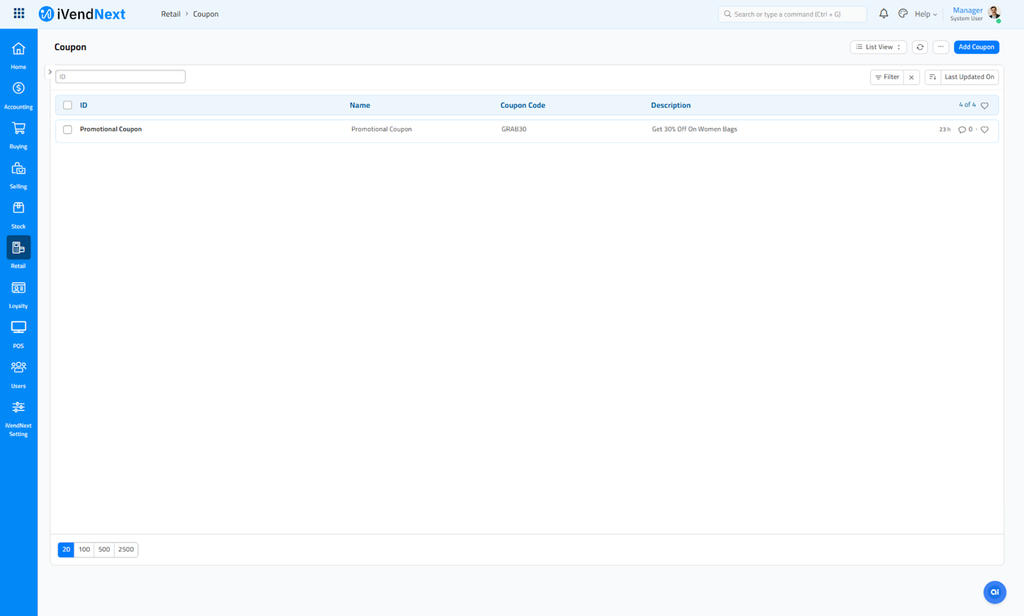
Step 1: Access the Coupon Screen
-
Log in to iVendNext.
-
Go to Home > Retail.
-
Click the Coupons shortcut.
Tip: Use the Awesome Bar (top-right) to search for “Coupon List,” “New Coupon,” or “Coupon Report.”
Step 2: Open the Coupon Creation Screen
-
If you are creating your first coupon, click Create Your First Coupon.
-
Otherwise, click Add Coupon.
The Coupon Creation screen includes the following sections:
-
Details
-
Coupon Setup
-
Applicability
-
Exclusion List
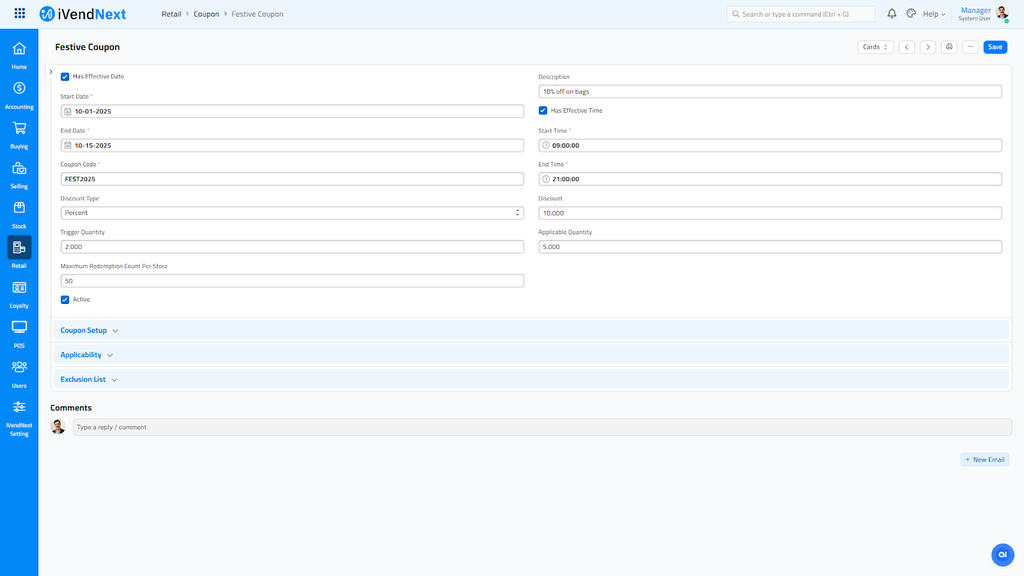
Step 3: Configure the Coupon Details Section
Configure the fields displayed on the Coupon Details Section. The table below provides recommended values based on the example.
| S No | Description | Value |
|---|---|---|
| 1 | Name | Festive Coupon |
| 2 | Description | 10% off on Bags |
| 3 | Has Effective Date | Yes |
| 4 | Start Date | 2025-10-01 |
| 5 | End Date | 2025-10-15 |
| 6 | Has Effective Time | Yes |
| 7 | Start Time | 9:00 AM |
| 8 | End Time | 9:00 PM |
| 9 | Coupon Code | FEST2025 |
| 10 | Discount Type | Percentage |
| 11 | Discount | 10 |
| 12 | Applicable Quantity | 5 |
| 13 | Trigger Quantity | 2 |
| 14 | Maximum Redemption Count Per Store | 50 |
| 15 | Active | Yes |
Note:
Applicable Quantity - (max items per transaction eligible for discount)
Trigger Quantity - (minimum items required to apply the discount)
Step 4: Configure the Coupon Setup Section
Configure the product applicability fields displayed on the Coupon Setup Section. The table below provides recommended values based on the example.
| S No | Description | Value |
| 1 | Product Type | Item Group |
| 2 | Value | Women Bags |
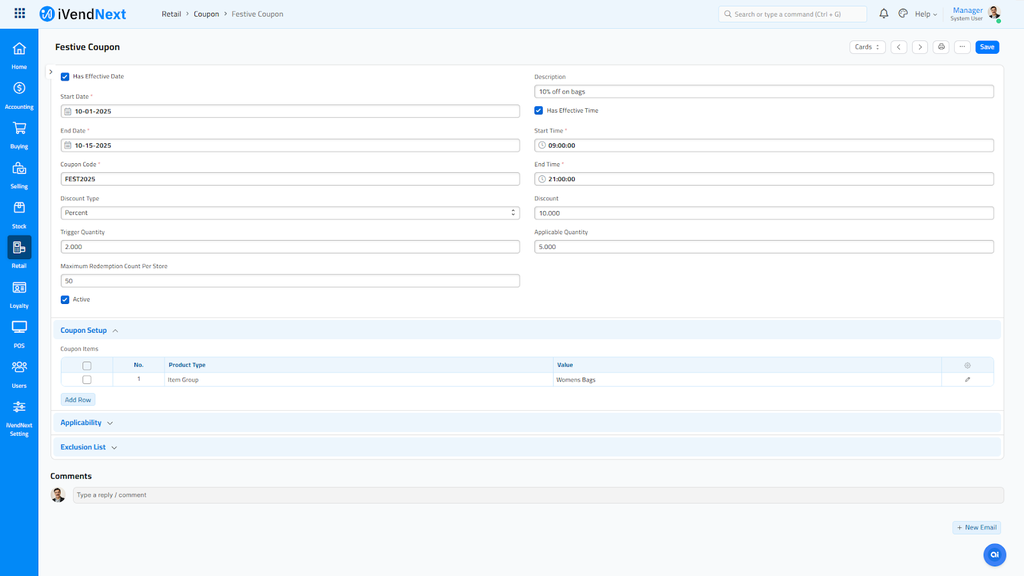
Note:
You can add multiple entries to include different products.
Step 5: Configure the Applicability Section
Customize the fields shown in the Coupon Applicability section, which is divided into two subsections:
-
The Applicable Source subsection allows you to specify the Store.
-
The Duration subsection lets you define the applicable days.
You can also set Applicability Rules — determining where, to whom, and when the coupon should apply. Refer to the table below for recommended values based on the provided example.
| S No | Description | Value |
| 1 | Source Type | Store |
| 2 | Source | Alpha Store |
| 3 | Duration | Everyday |
| 4 | Enabled | Yes |
| 5 | Day | Monday - Friday |
| 6 | Start Time | 09:00 hours |
| 7 | End Time | 21:00 hours |
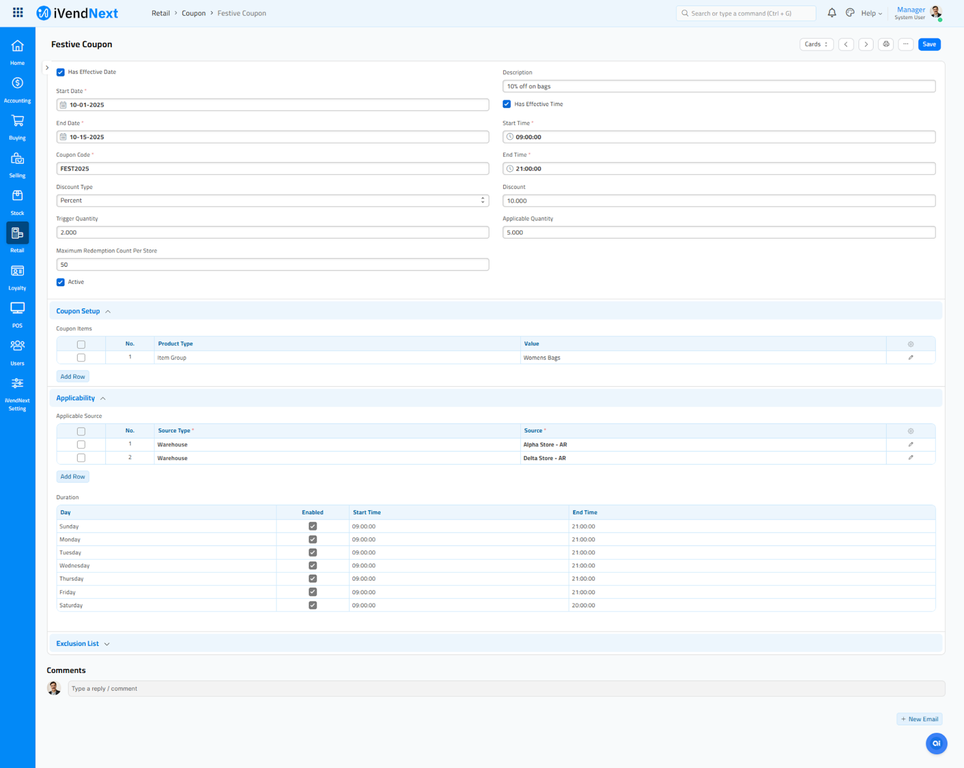
Note:
You have the option to restrict coupon availability to specific days and time slots. The application automatically applies the time zone you selected during initial setup to ensure accurate scheduling.
Removing the Delta Store from the Source has effectively excluded it.
Step 7: Configure the Exclusion List Section
Set up the fields shown in the Coupon Exclusion List section, which allows you to specify where the coupon should not be applied. Refer to the table below for suggested values based on the example.
| S No | Description | Value |
| 1 | Source Type | Customer Group |
| 2 | Source | Commercial |

Note:
Double-check exclusion criteria before launching any coupon live
Step 8: The Outcome
Click Save to activate the coupon with the defined rules. The Festive Coupon is configured to:
–Apply 10% off on all Bags.
–Work every day from 9:00 AM to 9:00 PM.
–Require a minimum purchase of 2 Bags, with a maximum of 5 Bags per transaction.
–Be limited to 50 redemptions per store.
–Be valid only in the Alpha Store, and excluded from the Delta Store.
Applying Coupons at the Point of Sale (POS)
We have configured a Coupon in iVendNext based on the scenario above. This section outlines the steps required to successfully apply a coupon during a POS transaction.
Steps to apply a Coupon in iVendNext POS
For ease of understanding, we have broken down the steps to apply a coupon in iVendNext in the following steps:
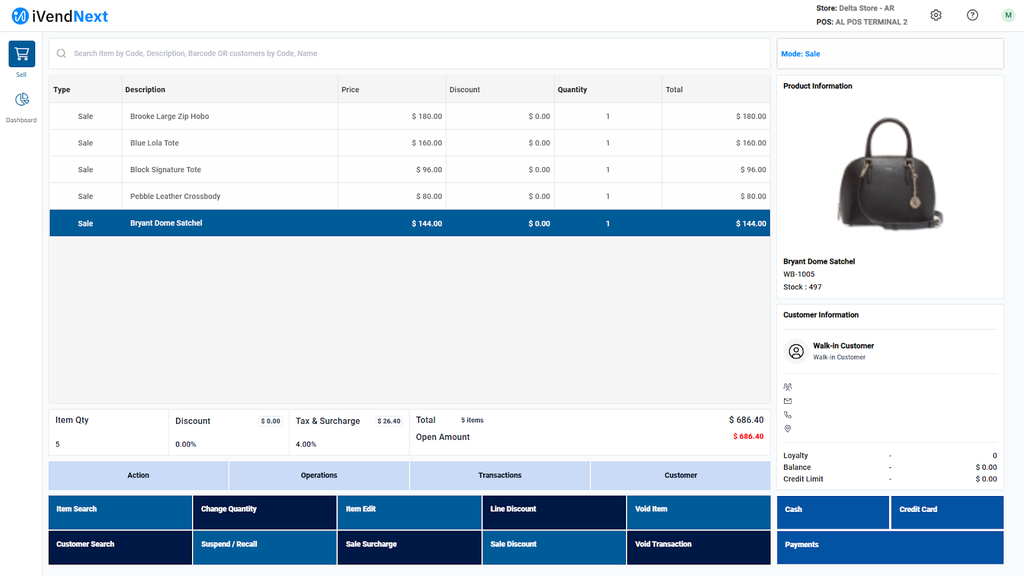
Add Item(s) to the sale transaction
To add items to a transaction, use the Item Search Bar on the transaction screen. You can locate items by entering their Item Code, Description, or Barcode. For ease of understanding, we have added the below items:
-
WB-1001
-
WB-1002
-
WB-1003
-
WB-1004
-
WB-1005
Note:
You may choose any item, but for illustration purposes, we’ve selected shirt items to demonstrate the coupon setup scenario used in this article.
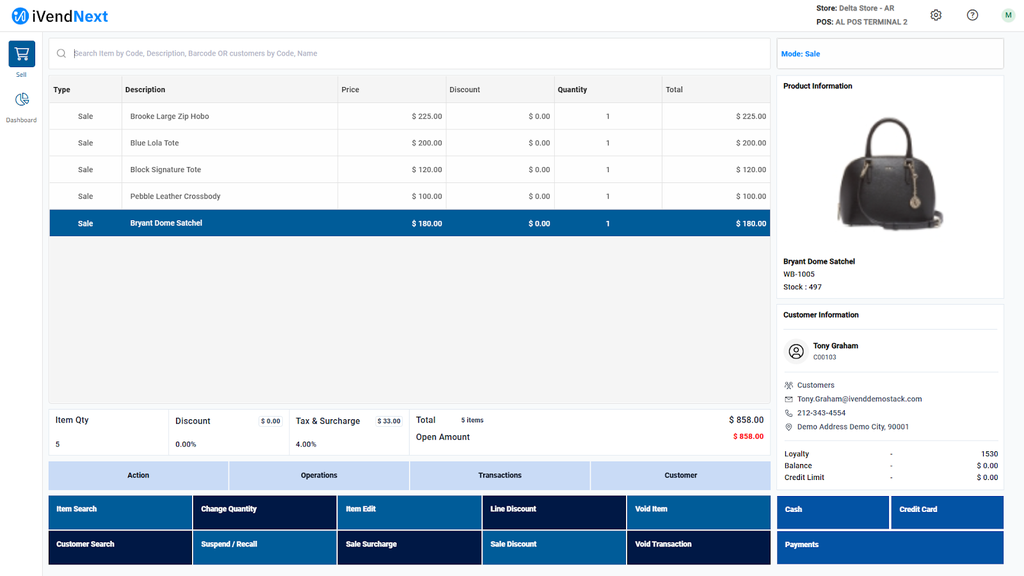
Add Customer to the Sale Transaction (Recommended)
To associate a sale with a specific customer, use any of the following search filters on the transaction screen:
-
Customer Code
-
Customer Name
-
Email Address
-
Phone Number
Note:
While this step is optional, it is strongly recommended to ensure the transaction is properly recorded under the customer's name.
If he is a new customer, you can add him to the database.
Apply Coupon
Click Operations > Apply Coupon. Then type the Coupon Code: Fest25

Finalizing a Sale with Coupons Applied
Once all sale adjustments—including any applicable coupons, the cashier proceeds to finalize the sale. This is done by selecting Checkout on the transaction screen, which transitions to the Payments screen.
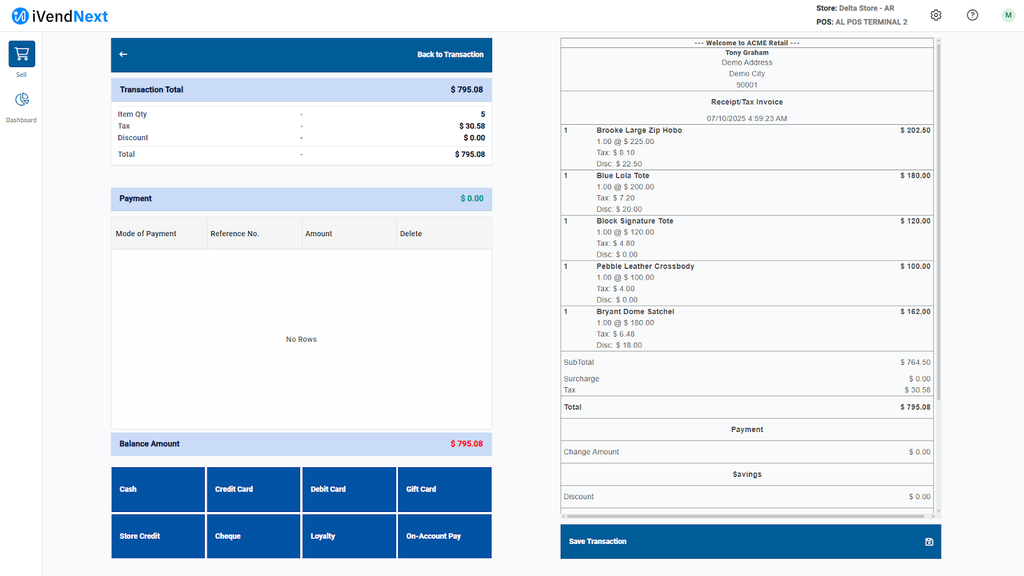
The cashier then chooses the customer’s preferred payment method. Common options include:
-
💵 Cash
-
💳 Credit/Debit Card
-
📱 Mobile Wallets
-
🎁 Gift Cards
-
🏬 Store Credit
-
🔀 Split Payment (combining multiple methods)
The application automatically calculates the final payable amount, factoring in:
-
✅ Coupons and other discounts
-
🧾 Taxes
-
💲 Surcharges (if any)
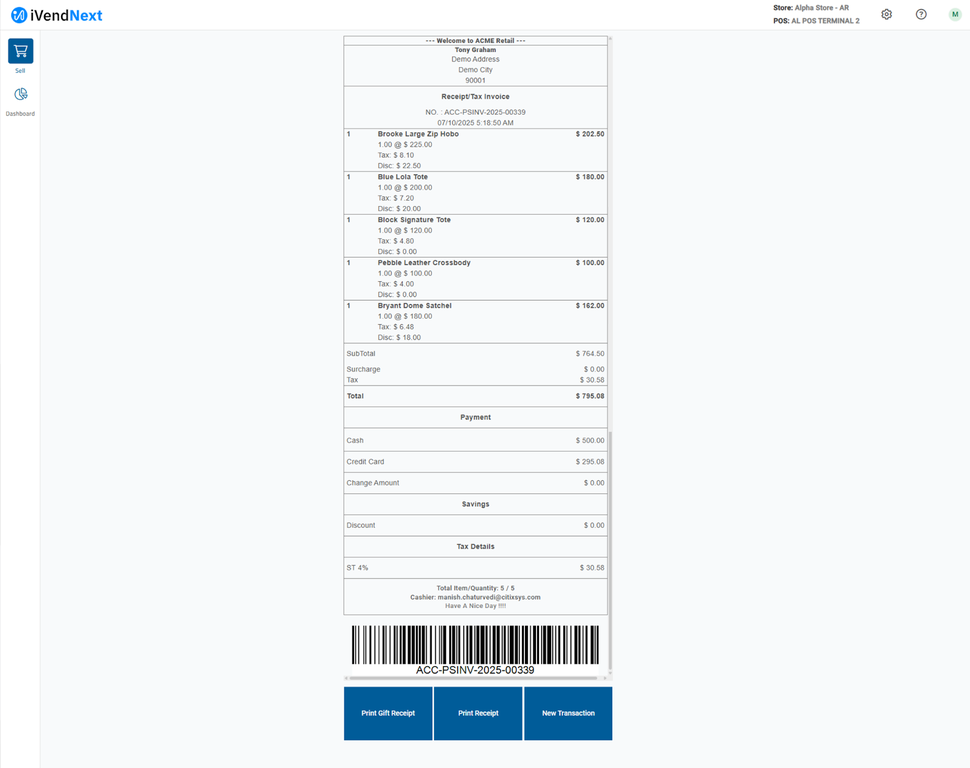
Once the transaction is confirmed, the iVendNext POS prints a receipt via the connected printer. This receipt typically includes:
-
🕒 Transaction details (date, time, store, cashier ID)
-
📦 Itemized list of purchased products
-
🎟️ Coupons applied, along with other discounts and surcharges
-
🧮 Tax breakdown
-
💰 Payment method used
-
🌟 Loyalty points earned (if applicable)
Note:
Whether printed or digital, the receipt serves as proof of purchase and may be required for returns or exchanges.
To begin a new transaction, simply click NEW TRANSACTION to return to the Enter New Sale screen.