iVendNext Settings
Introduction
The Retail module in iVendNext centers around the Point of Sale (POS) and Retail functions. It offers a streamlined solution for managing retail processes efficiently. It seamlessly integrates with inventory management, updating stock levels in real-time and preventing stock discrepancies. It also supports multiple payment methods, streamlining the payment process for customers and reducing transaction errors. With reporting and analytics built in, your businesses can gain valuable insights into sales performance, top-selling items, and customer trends. This will help you make informed decisions improving the overall efficiency and profitability in your retail operations.
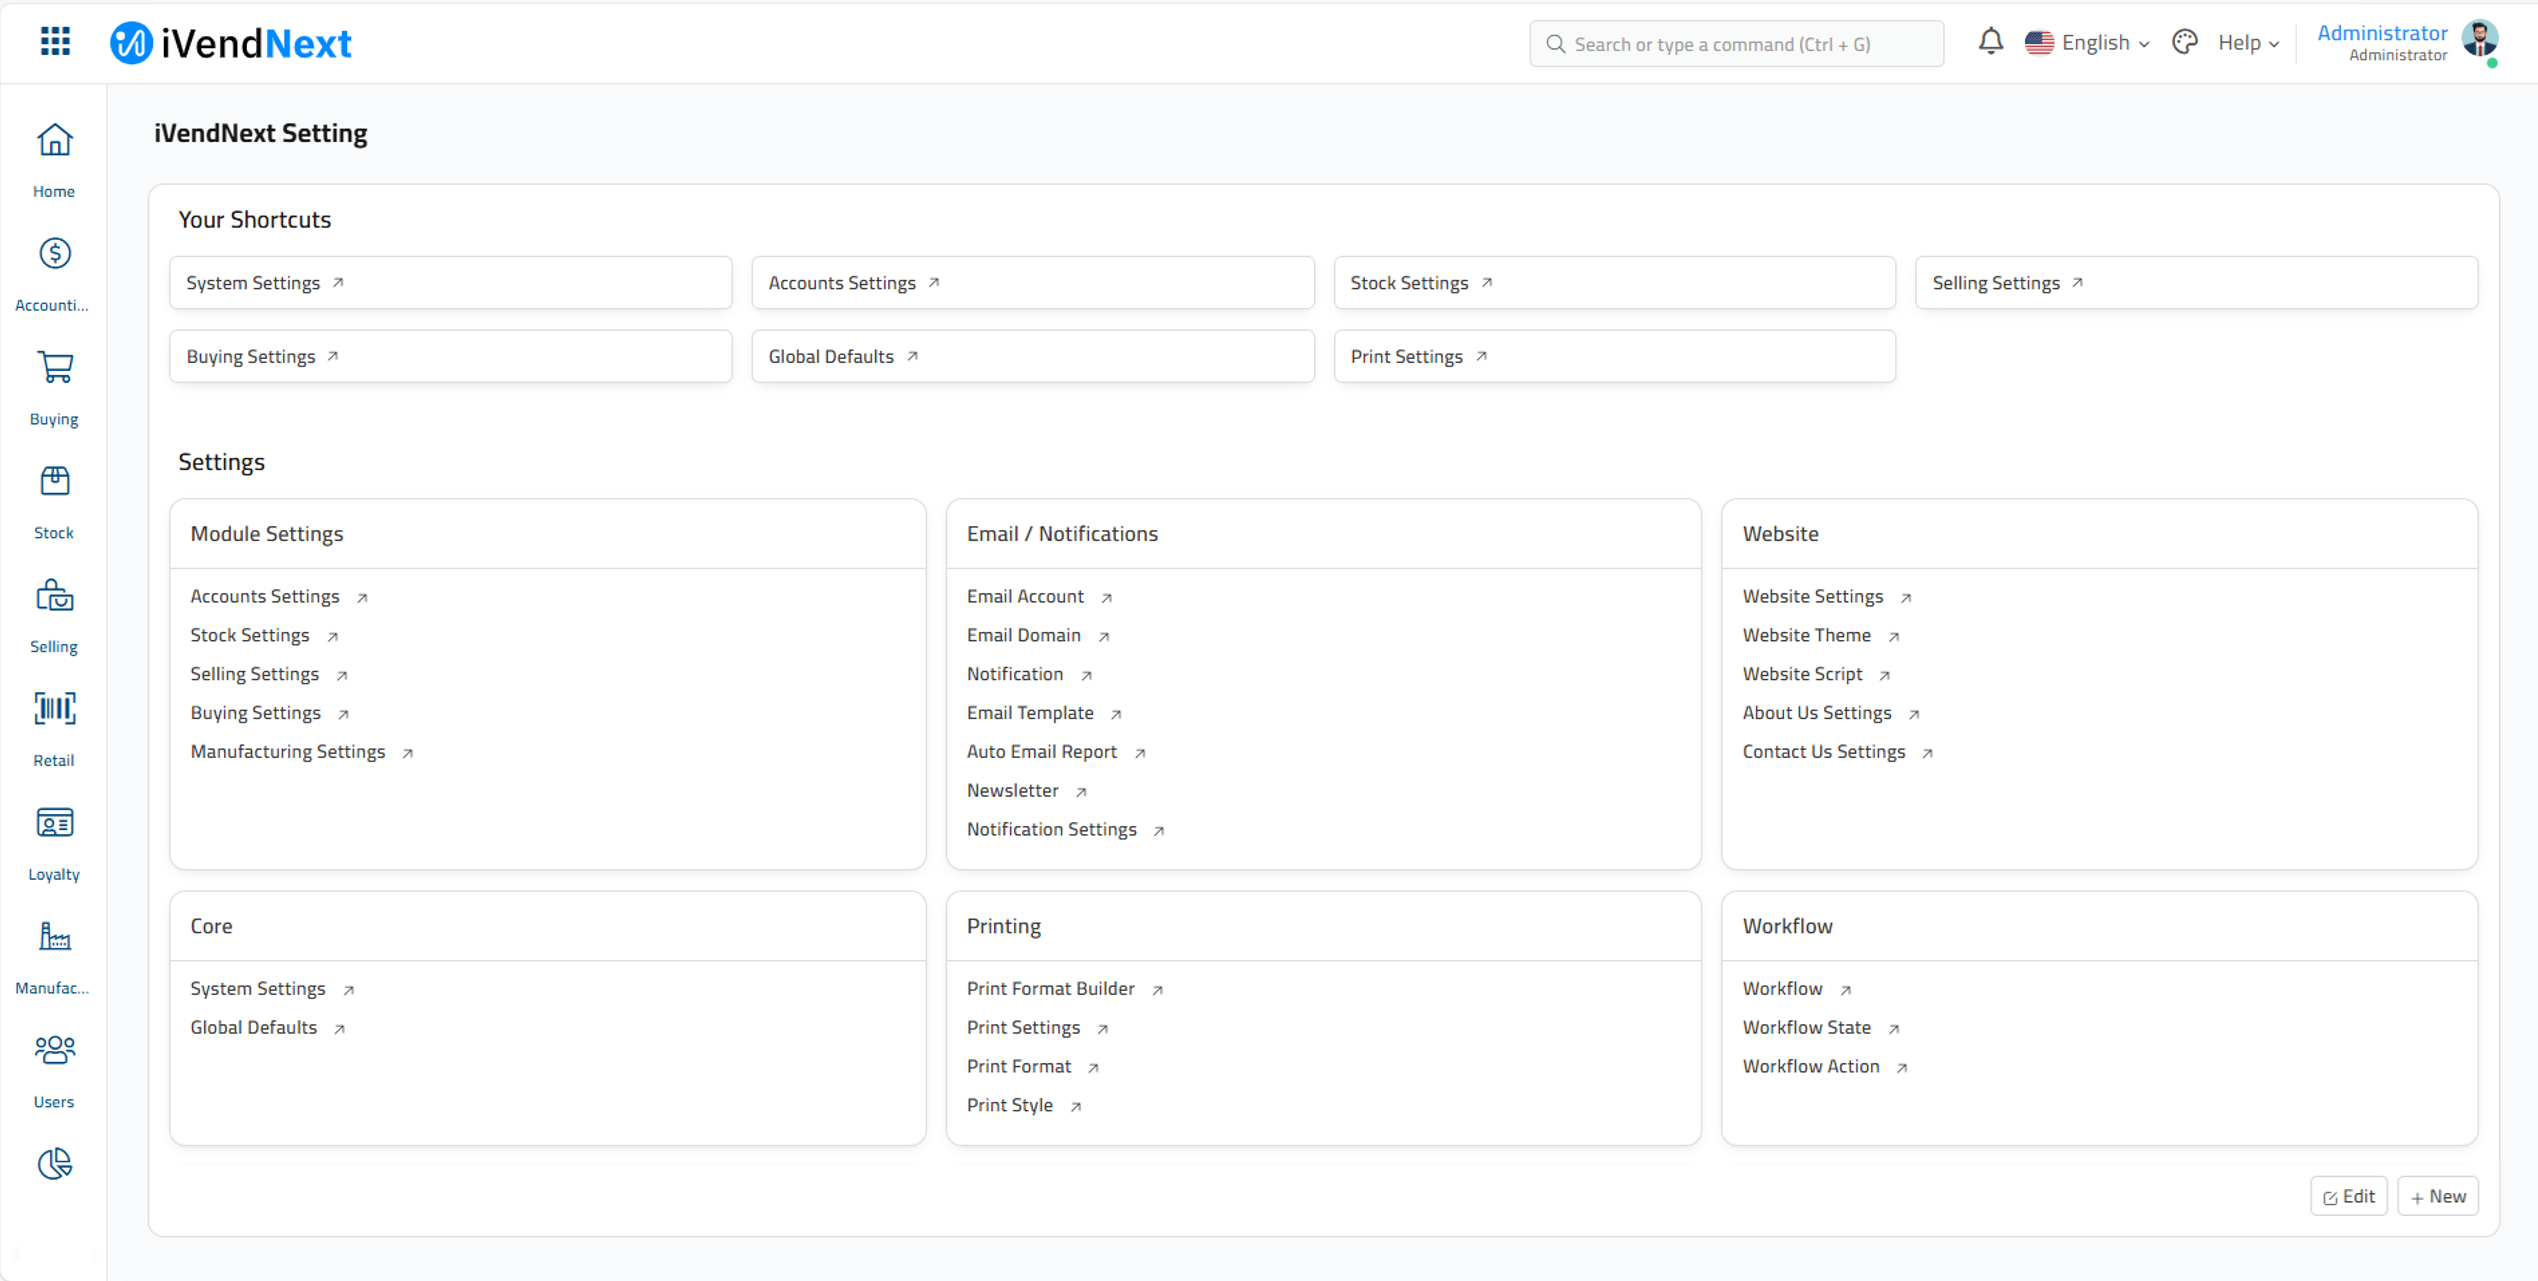
All the settings pertaining to iVendNext can be found here. These settings are:
Accounts Settings
Buying Settings
CRM Settings
Domain Settings
Portal Settings
Selling Settings
Stock Settings
Account Settings
The Account settings are spread across the following sections:
Invoice and Billing
Credit Limits
POS
Assets
Accounts Closing
Chart Of Accounts
Banking
Reports
Invoice and Billing
The Invoice and Billing section on the Account settings screen is further split into the following subsections:
Invoice Cancellation
The various fields under Invoice Cancellation are explained below:
Unlink Payment on Cancellation of Invoice
Check this box to unlink any payment information attached to an invoice in the event of invoice cancellation. A sales invoice is a document containing a list of products or services that a customer has purchased along with their prices, the sales tax, the total amount, and the payment information along with the payment due date.
Unlink Advance Payment on Cancellation of Order
You can make full or partial payments in advance to suppliers for an entire order or for specific line items. Check this box if you want to unlink any advance payment option when the order has been canceled.
Delete Accounting and Stock Ledger Entries on deletion of Transaction
Check this box if you want to delete all the Accounting and Stock entries from the ledger when the transaction is deleted. The term "Ledger" means a page in an accounting book where entries are made. All types of accounting entries other than Sales and Purchase transactions are made using the Journal Entry. A Journal Entry is a standard accounting transaction that affects multiple Accounts and the sum of debits is equal to the sum of credits. Inward or outward movement of items related to Manufacturing, Purchasing, Selling, and Stock Transfers are recorded in the Stock Ledger. Check this box if you want to delete all the Accounting and Stock entries from the ledger when the transaction is deleted.
Invoice Features
The various fields under Invoice Features are explained below:
Check Supplier Invoice Number Uniqueness
Check this box to ensure that each Purchase Invoice is assigned a unique value. This unique value is displayed in the Supplier Invoice under the Supplier Invoice No field.
Automatically Fetch Payment Terms from Order
Check this box to ensure that the Payment Terms from orders are automatically fetched into the invoice(s) from the Payment Terms and Conditions Template.
Enable Common Party Accounting
Check this box to enable common party accounting. As per the common party accounting model, a common receivable account called Debtor is auto-created under Account Receivables. This is a default Receivable Account for all the Customers. A common payable account called Creditor is auto-created under Account Payables. This is a default Payables Account for all customers.
Allow multi-currency invoices against single party account
Check this box to allow creation of multi-currency invoices against single party accounts. This will allow you to create invoices in the foreign currency.
Journals
The various fields under Journals are explained below:
Merge Similar Account Heads
Check this box to merge rows with the same account heads on the Ledger.
Deferred Accounting Settings
The various fields under Invoice Cancellation are explained below:
Book Deferred Entries Based On
Select a valid option from the drop down list. You have the option to choose between days or months. If "Months" is selected, a fixed amount will be booked as deferred revenue or expense for each month irrespective of the number of days in a month. If “Days” is selected the amount will be prorated. Deferral is an amount received or paid before the delivery of actual services or products. Deferral Account is used to record prepaid expenses or pre-earned revenues.
Automatically Process Deferred Accounting Entry
Check this box if you want the Deferred Account Entries to be processed automatically. Deferral is an amount received or paid before the delivery of actual services or products. Deferral Account is used to record prepaid expenses or pre-earned revenues.
Book Deferred Entries Via Journal Entry
Check this box if you want to book the deferred accounting entries via journal entry. If this is unchecked, direct GL entries will be created to book deferred revenue or expenses. See: Journal Entry
Text Settings
The various fields under Text Settings are explained below:
Determine Address Tax Category From
Select an address from the drop down list. You can either choose the Billing Address or the Shipping Address to determine the Tax Category. A Tax Category allows applying one or more Tax Rules to transactions based on various criteria. Address used to determine Tax Category in transactions. See: Tax Category
Automatically Add Taxes and Charges from Item Tax Template
Check this box if you want the taxes and charges to apply automatically based on the taxes and charges specified in the Item Tax Template. Item Tax Template is useful for item wise taxation. If some of your Items have tax rates different from the standard tax rate assigned in the Taxes and Charges table, then you can create an Item Tax Template and assign it to an Item or Item Group. The rate assigned in the Item Tax Template will get preference over the standard tax rate assigned in the Taxes and Charges table.
Book Tax Loss on Early Payment Discount
Split Early Payment Discount Loss into Income and Tax Loss. An early payment discount also known as cash discount or prompt payment discount is one form of trade finance in which a buyer pays less than the full invoice amount due by paying the supplier earlier than the invoice maturity date. When a business decides to go in for early pay discount, it would debit accounts payable for the full invoice amount, then record a credit to early pay discount and the remaining amount to cash (the early pay discount reduces the amount of cash the company must pay).
Round Tax Amount Row-wise
Check this box if you want the Tax Amount to be rounded on a row (items) level.
Print Settings
The various fields under Print Settings are explained below:
Show Inclusive Tax in Print
Check this box if you want the inclusive tax to be displayed on the printed invoice.
Show Taxes as Table in Print
Check this box if you want to show the taxes in a table grid format on the printed invoice.
Show Payment Schedule in Print
Check this box if you want to show the payment schedule on the printed invoice.
Currency Exchange Settings
The various fields under Currency Exchange are explained below:
Allow Stale Exchange Rates
Check this box if you want to enable the stale exchange rate feature. This feature allows you to save specific currency exchange rates, rather than always fetching the currency exchange rate on a real time basis. In your sales and purchase transactions, if the field of Currency Exchange Rate is frozen, that is because the feature of allowing stale exchange rates in transactions is enabled. If you wish to make the Currency Exchange Rate field editable again, then disable the feature of Stale Exchange Rate using the Accounting Master. In iVendNext, saved exchange rates are also referred to as Stale Exchange Rate.
Payment Reconciliations
The various fields under Payment Reconciliations are explained below:
Auto Reconcile Payments
Check this box if you want to automate payment reconciliation. Payment Reconciliation is used to link payments with invoices. An invoice can be reconciled either against a Payment Entry or a Credit/Debit note. If an invoice is reconciled against a Payment Entry, the journal entry is not auto-created. This is because payment entries are associated with linked transactions. If an invoice is reconciled against a Credit/Debit Note, the journal entry is auto-created to allocate a credit/debit note to an invoice that is being reconciled. This automatic creation of a journal entry is necessary since credit/debit notes do not have linked transactions. The journal entry resulting from the reconciliation indicates the adjustment of a particular credit/debit note with a specific invoice.
Credit Limits
The various fields under Credit Limits are explained below:
Over Billing Allowance (%)
The percentage you are allowed to bill more against the amount ordered. For example, if the order value is $100 for an item and tolerance is set as 10%, then you are allowed to bill up to $110
Role Allowed to Over Bill
Select a Role from the drop down list or choose to create a new Role by clicking on the create a new Role option. A Role defines the permissions for accessing various documents in iVendNext. Roles define a set of permissions which can be set from the Roles Permission Manager. Most commonly used roles are already defined in iVendNext, you can use the system with them. If needed, you can add more roles. Users with this role are allowed to over bill above the allowance percentage.
Role allowed to bypass Credit Limit
Select a Role from the drop down list or choose to create a new Role by clicking on the create a new Role option. A Role defines the permissions for accessing various documents in iVendNext. Roles define a set of permissions which can be set from the Roles Permission Manager. Most commonly used roles are already defined in iVendNext, you can use the system with them. If needed, you can add more roles. Users with this role are allowed to bypass Credit Limit. Credit Limit is the maximum amount of credit you are willing to offer to a Customer. When a Sales Order or a Sales Invoice is submitted, the Credit Limit will be checked.
POS
The various fields under POS are explained below:
Create Ledger Entries for Change Amount
Check this box if you want to allow the ledger entries to be posted for the change amount in POS transactions.
Assets
The various fields under Assets are explained below:
Book Asset Depreciation Entry Automatically
Check this box if you want to enable booking of depreciation entries automatically from Accounts Settings. This will create depreciation entries automatically on the scheduled dates. Otherwise, you have to create the Journal Entry manually by clicking the "Make Depreciation Entry" button in the corresponding Depreciation Schedule row.
Accounts Closing
The various fields under Accounts Closing are explained below:
Accounts Frozen Till Date
Select the Accounts Frozen Till date from the calendar pop up screen. Accounting entries are frozen up to this date. Nobody can create or modify the accounting entries except the users who have been assigned the role with the required permissions to edit/modify the accounting entries. You can still allow users with certain roles to create/edit entries within accounts frozen date. You can set that Role in the Account Settings itself.
Ignore Account Closing Balance
Financial reports will be generated using GL Entry doctypes (should be enabled if Period Closing Voucher is not posted for all years sequentially or missing)
Role Allowed to Set Frozen Accounts and Edit Frozen Entries
Users with this role are allowed to set frozen accounts and create / modify accounting entries against frozen accounts
Chart of Accounts
The various fields under Chart of Accounts are explained below:
Show Balances in Chart Of Accounts
Check this box if you want to show the balance in your chart of accounts. The Chart of Accounts is the blueprint of the accounts in your organization and is based on a system of double entry accounting. Chart of Accounts is a tree view of the names of the Accounts (Ledgers and Groups) that a Company requires to manage its books of accounts. See: Chart of Accounts
Banking
The various fields under Banking are explained below:
Enable Automatic Party Matching
Check this box to enable automatic party matching feature. This way, based on the bank transaction type, the parties will be automatically fetched. You can add Bank Accounts in iVendNext for Company, Supplier, Customer, or any other party with whom transactions are carried out. Doing this lets you record all the bank transactions correctly for accounting accuracy. Party Type: If this is not a company account, set who this account belongs to. The available options are: Customer, Employee, Member, Shareholder, Student, and Supplier. See: Bank Account
Reports
The various fields under Reports are explained below:
General Ledger
Use this field to truncate the 'Remarks' column to the specified character length
Accounts Receivable/Payable
Use this field to truncate the 'Remarks' column to the specified character length
Stock Settings
The Stock settings are spread across the following sections:
Defaults
Stock Validations
Stock Reservation
Serial & Batch Item
Stock Planning
Stock Closing
Defaults
The Defaults section on the Stock settings screen is further split into the following subsections:
Item Defaults
Price List Defaults
Stock UOM Quantity
Item Defaults
The various fields under Item Defaults are explained below:
Item Naming By
Setting a naming series will allow the ID's to be generated automatically whenever a new employee record is created.
Default Valuation Method
Select the Default Valuation Method from the drop down list. Valuation Rate of an item is calculated based on the total expense incurred to make the product available for sale like freight, labor, cost of raw materials, etc.There are two options to maintain valuation of stock. These are: FIFO (first in - first out) and Moving Average.
Default Item Group
Specify the Default Item Group. Select the Default Item Group from the drop down list displayed or choose to create a new Item Group by clicking on the Create a new Item Group option. See: Item Group
Default Warehouse
Select the Default Warehouse from the list of warehouses displayed or choose to create a new Warehouse by clicking on the Create a new Warehouse shortcut. This is the Warehouse that is automatically selected in your transactions with this item. A warehouse is a commercial building for storage of goods. Warehouses are used by manufacturers, importers, exporters, wholesalers, transport businesses, customs, etc.
Sample Retention Warehouse
Select the Sample Retention Warehouse from the list of warehouses displayed or choose to create a new Sample Retention Warehouse by clicking on the Create a new Warehouse shortcut. A Sample Warehouse is a warehouse that is solely meant for the purpose of retaining sample stock. Sample stock is a batch of any Items stored for analyzing should the need arise later. The Item for which sample stock is stored can be raw material, packaging material, or finished product.
Default Stock UOM
Select the Stock UOM from the drop down list or choose to create a new Stock UOM by clicking on the Create a new UOM option. A Stock UoM is a unit using which an Item is stocked.
Price List Defaults
The various fields under Price List Defaults are explained below:
Auto Insert Item Price If Missing
Check this if you want to update the price of an item automatically. Item Price is the record in which you can log the selling and buying rate of an item. This will unlock an additional field called ‘Update Existing Price List’.
Update Existing Price List Rate
Check this if you want to update the existing Price List rate based on the new item price.
Enabling this will insert an Item Price to the Price List of an Item automatically when using the Item in its first transaction. This price is fetched from the 'Rate' set in the first transaction with the Item. The Price List depends on whether you're using a Purchase or Sales transaction. Note that, the Item Price will be automatically inserted only in the first transaction if not already present.If this is unticked, the 'Standard Selling Rate' set in the Item when creating the Item will be added as Item Price. A Price List is a collection of Item Prices either Selling, Buying, or both. iVendNext lets you maintain multiple Selling and Buying Item Prices using Price Lists. An Item can have multiple prices based on customer, currency, region, shipping cost, etc, which can be stored as different rate plans.
Stock UOM Quantity
The various fields under Stock UOM are explained below:
Allow to Edit Stock UOM Qty for Sales Documents
Check this box if you want the user to be able to edit the Stock UOM for the sales documents.
Allow to Edit Stock UOM Qty for Purchase Documents
Check this box if you want the user to be able to edit the Stock UOM for the purchase documents.
Stock Validations
The Stock Validations section on the Stock settings screen is further split into the following subsections:
Stock Transaction Settings
Quality Inspection Settings
Stock Transactions Settings
The various fields under Stock Transaction Settings are explained below:
Over Delivery/Receipt Allowance (%)
The percentage you are allowed to receive or deliver more against the quantity ordered. For example, if you have ordered 100 units, and your Allowance is 10%, then you are allowed to receive 110 units.
Over Transfer Allowance
The percentage you are allowed to transfer more against the quantity ordered. For example, if you have ordered 100 units, and your Allowance is 10%, then you are allowed to transfer 110 units.
Role Allowed to Over Deliver/Receive
Users with this role are allowed to over deliver/receive against orders above the allowance percentage
Allow Negative Stock
Check this box if you want the cashier to be able to sell the items even if they are not showing up in the system inventory. This will allow stock items to be displayed in negative values. Instead of enabling negative stock globally you can also enable it for specific items.
Show Barcode Field in Stock Transactions
Check this box if you want the cashier to be able to use a barcode scanner to scan the stock items.
Convert Item Description to Clean HTML in Transactions
Usually, descriptions are copy-pasted from a website or Word/PDF file and they contain a lot of embedded styles. This messes up the Print view of your invoices or quotes.
To fix this, you can check "Convert Item Description to Clean HTML" in Stock Settings. This will ensure that when you save the Items, their descriptions will be cleaned up.
If you want to control your description, views, and allow any HTML to be embedded, you can uncheck this property.
Quality Inspection Settings
The various fields under Quality Inspection Settings are explained below:
Action If Quality Inspection Is Not Submitted
Select an option from the drop down list. The value that you select here will determine the consequent action in case the Quality Inspection was not submitted. A single Quality Inspection consists of many Quality Checks (Parameters) within it. Each of these checks could be Numeric, Non-numeric or Formula Based. All the Quality Checks have automatic acceptance/rejection on Save.
Action If Quality Inspection Is Rejected
Select an option from the drop down list. The value that you select here will determine the consequent action in case the Quality Inspection was rejected. A single Quality Inspection consists of many Quality Checks (Parameters) within it. Each of these checks could be Numeric, Non-numeric or Formula Based. All the Quality Checks have automatic acceptance/rejection on Save.
Stock Reservation
The various fields under Stock Reservation are explained below:
Enable Stock Reservation
Check this box to keep aside a specific quantity of inventory for a particular order. Stock reservation, also known as inventory reservation, refers to the practice of setting aside a specific quantity of stock or inventory for a particular purpose or customer. See: Stock Reservation
Allow Partial Reservation
Partial stock can be reserved. For example, If you have a Sales Order of 100 units and the Available Stock is 90 units then a Stock Reservation Entry will be created for 90 units. This field is visible only when the "Enable Stock Reservation" checkbox is ticked.
Auto Reserve Stock for Sales Order on Purchase
Stock will be reserved on submission of Purchase Receipt created against Material Receipt for Sales Order. This field is visible only when the "Enable Stock Reservation" checkbox is ticked.
Auto Reserve Serial and Batch Nos
Serial and Batch Nos will be auto-reserved based on Pick Serial / Batch Based On
This field is visible only when the "Enable Stock Reservation" checkbox is ticked.
Serial and Batch Item
The various fields under Serial and Batch are explained below:
Auto Create Serial and Batch Bundle For Outward
Check this box to automate the creation of "Serial and Batch Bundle" for the outward entry. After the configuration when the user creates the Delivery Note or Stock Entry with the Type "Material Issue", the system will create the "Serial and Batch Bundle" for outward automatically on submission of the record. See: Serial and Batch Bundle
Disable Serial No And Batch Selector
If users don't want to use the Serial and Batch Selector (popup) then they can disable it through Stock Settings. To disable it, goto Stock Settings > Serial and Batch Item (TAB) > "Disable Serial No And Batch Selector" enable this checkbox and save.
Have a Default Naming Series for Batch ID?
Check this box if you want to use a default naming series for Batch ID. This will unlock the Naming Series Prefix field.
Naming Series Prefix
Specify the Naming Series Prefix in the text box field. This field is visible only when the checkbox ‘Have a Default Naming Series for Batch ID’ is ticked.
Use Serial / Batch Fields
On submission of the stock transaction, the system will auto create the Serial and Batch Bundle based on the Serial No / Batch fields. These fields are solely used for entering serial numbers and batches. The system will automatically create the Serial and Batch Bundle upon the submission of the stock transaction. To enable this feature, users must navigate to Stock Settings and enable the 'Use Serial / Batch Fields' option. After that when the user creates the stock transaction like a delivery note, the system will show the old Serial / Batch Fields.
Do Not Update Serial / Batch on Creation of Auto Bundle
If enabled, do not update serial / batch values in the stock transactions on creation of auto Serial / Batch Bundle. This field is visible only when the checkbox ‘Use Serial / Batch Fields’ checkbox is ticked.
Stock Planning
The Stock Planning section on the Stock settings screen is further split into the following subsections:
Auto Material Request
Inter Warehouse Transfer Settings
Auto Material Request
The various fields under Auto Material Request are explained below:
Raise Material Request When Stock Reaches Re-order Level
This option is useful if you want to ensure a constant supply of raw materials/products and avoid shortage. A Material Request will be raised automatically when stock reached the re-order level defined in the Item form.
Notify by Email on Creation of Automatic Material Request
An email will be sent to notify the User with the role 'Purchase Manager' when an automatic Material Request is created.
Inter Warehouse Transfer Settings
The various fields under Inter Warehouse Transfer Settings are explained below:
Allow Material Transfer from Delivery Note to Sales Invoice
You can enable the Target Warehouse from Stock Settings by enabling "Allow Material Transfer From Delivery Note and Sales Invoice". Also note that the selected customer should represent the same company. For this, enable the 'Is Internal Customer' option in the customer form and select your company in the 'Represents Company' field. See: Material Transfer from Delivery Note and Purchase Receipt
Allow Material Transfer from Purchase Receipt to Purchase Invoice
You can enable the Supplier Warehouse from Stock Settings as shown above. Also note that the selected supplier should represent the same company. For this, enable the 'Is Internal Supplier' option in the Supplier form and select your company in the 'Represents Company' field. See: Material Transfer from Delivery Note and Purchase Receipt
Stock Closing
The various fields under Stock Closing are explained below:
Stock Frozen Up To
No stock transactions can be created or modified before this date.
Freeze Stocks Older Than (Days)
Stock transactions that are older than the mentioned days cannot be modified.
Role Allowed to Create/Edit Back-dated Transactions
If mentioned, the system will allow only the users with this Role to create or modify any stock transaction earlier than the latest stock transaction for a specific item and warehouse. If set as blank, it allows all users to create/edit back-dated transactions.
Selling Settings
The Selling settings are spread across the following subsections:
Customer Defaults
Item Price Settings
Transaction Settings
Customer Defaults
The various fields under Customer Defaults are explained below:
Customer Naming By
Select the customer naming series from the drop down list. Setting a naming series will allow the ID's to be generated automatically whenever a new customer record is created. By default, Customer ID is generated based on Customer Name. If you wish to save a Customer using a naming series, in the field Customer Naming Series, set value as ‘Naming Series'. Examples of Customer IDs saved in Naming Series - "CUST00001, CUST00002, CUST00003..." and so on.
Default Customer Group
Select the Customer Group from the drop down list or choose to create a new Customer Group by clicking on the create a new Customer Group option. The groups - Individual, Commercial, NonProfit and Government are available by default. However, you can create additional groups if you need. See: Customer Group
Default Territory
A Territory is a geographical region you do business in. In iVendNext, a Territory is used to classify Customers, Addresses, in accounting reports, and to allocate sales targets.
You can set the default customer group, territory and price list in Selling Settings. Select a default Territory which will be auto-updated when creating a new Customer.
Quotations can be created for the Customers as well as for the Leads. When converting a Quotation into a Sales Order, which is created for a Lead, the system attempts to convert that Lead into a Customer. While creating Customer in the backend, the value for Territory is picked from Selling Settings. If no default values are found for Territory, then you will receive a validation message asking for the Territory. You can also manually convert a Lead into a Customer.
Item Price Settings
The various fields under Customer Defaults are explained below:
Default Price List
Select a Price List from the drop down list or choose to create a new Price List by clicking on the Create a new Price List option. A Price List is a collection of Item Prices either Selling, Buying, or both.
Maintain Same Rate Throughout Sales Cycle
If this is enabled, iVendNext will validate whether an Item's price is changing in a Delivery Note or Sales Invoice created from a Sales Order, i.e. it will help you maintain the same rate throughout the sales cycle.
Allow User to Edit Price List Rate in Transactions
The item table in sale transactions has a field called Price List Rate. This field is non-editable by default in all the sales transactions. This is to ensure that the price of an item is fetched from the Item Price record and the user is not able to edit it.
If you need the Item Price fetched from the Price List of an item to be editable, you should uncheck this field.
Validate Selling Price for Item Against Purchase Rate or Valuation Rate
When making sales, it's important to know that you're not making losses. Enabling this validation will validate the item's Selling Price with its valuation/buying price. If an item's selling price is found to be less than its buying price, then you will get a prompt when this checkbox is ticked.
Calculate Product Bundle Price based on Child Items' Rates
Enabling this will make the Rate column of all Packed/Bundle Items tables editable. This will let you calculate the prices of all Product Bundles in the Items table, based on the prices of its Child Items, specified in the Packed/Bundle Items table. If this is enabled, updating the rate of the Product Bundle in the Items table will not change its price. It will get reset to the price based on its Child Items on saving the doc.
Allow Negative rates for Items
Enable this to allow negative rates for items. Negative pricing situations arise when either the demand for a product decreases significantly or the supply surges to the point where owners or suppliers are willing to pay others to take the product. Such situations can occur due to the costs associated with transportation, storage, and disposal, even when there is minimal demand for the product. Halting production in a negative price situation would be more expensive than selling it at the POS.
Transaction Settings
The various fields under Customer Defaults are explained below:
Is Sales Order Required for Sales Invoice & Delivery Note Creation?
If you wish to make Sales Order creation mandatory before the creation of a Sales Invoice or a Delivery Note, then you should set the 'Sales Order Required' field as 'Yes'. By default, this will be 'No'. This configuration can be overridden for a particular customer by enabling the "Allow Sales Invoice Creation Without Sales Order" checkbox in customer master.
Is Delivery Note Required for Sales Invoice Creation?
To make Delivery Note creation as mandatory before Sales Invoice creation, you should set this field as 'Yes'. By default, this will be 'No'. This configuration can be overridden for a particular customer by enabling the "Allow Sales Invoice Creation Without Delivery Note" checkbox in customer master.
Sales Update Frequency in Company and Project
Select the sales update frequency from the drop down list. This will determine how often the Project and Company should be updated based on Sales Transactions. Your options are: Daily, Monthly, or Each Transaction.
Blanket Order Allowance (%)
A Blanket Order is a purchase order between the buyer and the supplier to deliver goods or services at specified intervals without requiring a new invoice for each purchase. When raising a Blanket Purchase Order, the buyer can agree on a specific quantity and a specific price for the commitment as well as a certain timeframe for receiving shipments. Specify the Blanket Order Allowance percentage that you are allowed to sell beyond the specified Blanket Order quantity.
Allow Item to be Added Multiple Times in a Transaction
This setting gives flexibility to the user to add the same item multiple times in a sale transaction.
Allow Multiple Sales Orders Against a Customer's Purchase Order
Check this box to allow creation of multiple sales orders against a single purchase order.
Allow Sales Order Creation For Expired Quotation
Setting this will allow conversion of expired quotation. Manager override is required for this feature. Configure Manager Override section "Expired Quotation" of Retail profile
Don't Reserve Sales Order Qty on Sales Return
When a Sales Order is created the item gets reserved. When a customer returns the item all reversal entries are automatically passed. Check this box if you Don't Reserve Sales Order Qty on Sales Return
Hide Customer's Tax ID from Sales Transactions
As per the statutory requirement, most of the Customers have a unique Tax ID assigned to them. They also need to have this tax ID fetched in the selling transactions. However, if you don't wish to use this functionality, you can disable it by checking this property.
Enable Discount Accounting for Selling
If enabled, additional ledger entries will be made for discounts in a separate Discount Account
Buying Settings
The Buying settings are spread across the following sections:
Naming Series and Price Defaults
Transaction Settings
Subcontracting Settings
Naming Series and Price Defaults Section
The various fields under the Naming Series and Price Defaults section of the Buying settings screen are explained below:
Supplier Naming By
When a Supplier is saved, the system generates a unique identity or name for that Supplier which can be used to refer to the Supplier in various Buying transactions.
If not configured otherwise, iVendNext uses the Supplier's Name as the unique name. If you want to identify Suppliers using names like SUPP-00001, SUPP-00002, or such other patterned series, select the value of Supplier Naming By as "Naming Series". See: Naming Series
Default Supplier Group
Configure what should be the default value of Supplier Group when creating a new Supplier. For example, if most of your suppliers supply you hardware, you can set the default as 'Hardware'.
Default Buying Price List
Configure what should be the default Price List when creating a new Buying transaction, the default is set as 'Standard Buying'. Item prices will be fetched from this Price List. You can modify the 'Price List' by using the arrow at the right-end of the field to change the currency and country.
Action If Same Rate is Not Maintained
You can configure the action that the system should take if the same rate is not maintained in the "Action If Same Rate is Not Maintained" field. You can either select Stop or Warn. If you select Stop, iVendNext will stop you from changing the price by throwing a validation error. If you select Warn, the system will let you save the transaction but warn you with a message if the rate is changed. This field will only be visible if Maintain Same Rate Throughout Purchase Cycle is enabled.
Role Allowed to Override Stop Action
This setting specifies which user roles have the permission to override the "Stop" action in the buying transaction due to discrepancy in the rate. Allow users to add a role to override "Stop" action for Maintain Same Rate Throughout Sales Cycle, if “Action if Same Rate is Not Maintained” was set to Stop. Note: This field will only be visible if 'Maintain Same Rate Throughout Sales Cycle' is enabled and 'Action if Same Rate is Not Maintained' is set to Stop.
Transaction Settings Section
The various fields under the Transaction Settings section of the Buying settings screen are explained below:
Is Purchase Order Required for Purchase Invoice & Receipt Creation?
If this option is configured "Yes", iVendNext will prevent you from creating a Purchase Invoice or a Purchase Receipt directly without creating a Purchase Order first. This configuration can be overridden for a particular supplier by enabling the "Allow Purchase Invoice Creation Without Purchase Order" checkbox in supplier master
Is Purchase Receipt Required for Purchase Invoice Creation?
If this option is configured "Yes", iVendNext will prevent you from creating a Purchase Invoice without creating a Purchase Receipt first. In case the Item being transacted is a service, it'll not require a receipt, you can directly create an Invoice. This configuration can be overridden for a particular supplier by enabling the "Allow Purchase Invoice Creation Without Purchase Receipt" checkbox in the supplier master
Blanket Order Allowance (%)
Percentage you are allowed to order beyond the Blanket Order quantity. You can set the percentage you are allowed to order more against the Blanket Order Quantity. For example: If you have a Blanket Order of Quantity 100 units. and your Allowance is 10% then you are allowed to order 110 units.
Update frequency of Project
The frequency at which project progress and company transaction details will be updated. By default it is for Each Transaction, you can also set it to Daily or Monthly if you have a lot of transactions every day.
Maintain Same Rate Throughout the Purchase Cycle
If this is enabled, iVendNext will validate whether an Item's price is changing in a Purchase Invoice or Purchase Receipt created from a Purchase Order, i.e. it will help you maintain the same rate throughout the purchase cycle. You can configure the action that the system should take if the same rate is not maintained in the "Action If Same Rate is Not Maintained" field. You can either select Stop or Warn. If you select Stop, iVendNext will stop you from changing the price by throwing a validation error. If you select Warn, the system will let you save the transaction but warn you with a message if the rate is changed. This field will only be visible if Maintain Same Rate Throughout Purchase Cycle is enabled.
Set Landed Cost Based on Purchase Invoice Rate
Users can enable the checkbox If they want to adjust the incoming rate (set using purchase receipt) based on the purchase invoice rate.
Allow Item To Be Added Multiple Times in a Transaction
When this checkbox is unchecked, an item cannot be added multiple times in the same Purchase Order. However, you can still explicitly change the quantity. This is a validation checkbox for preventing accidental purchase of the same item. This can be checked for specific use cases where there are multiple sources for the same material, for example in manufacturing.
Bill for Rejected Quantity in Purchase Invoice
If checked, Rejected Quantity will be included while making Purchase Invoice from Purchase Receipt.
Disable Last Purchase Rate
Check this box to disable the last purchase rate.
Show Pay Button in Purchase Order Portal
Check this box to show the pay button in the Purchase Order Portal.
Use Transaction Date Exchange Rate
While making Purchase Invoice from Purchase Order, use Exchange Rate on Invoice's transaction date rather than inheriting it from Purchase Order. Only applies for Purchase Invoice.
Subcontracting Settings Section
The various fields under the Subcontracting Settings section of the Buying settings screen are explained below:
Backflush Raw Materials of Subcontract Based On
In subcontracting, you employ an external party to carry out tasks for your organization, especially manufacturing. Subcontracting is a type of job contract that seeks to outsource certain kinds of work to other companies. You need to enter the Supplier Warehouse from where the raw materials will be taken and finished goods will be received in the Accepted Warehouse. Consider this like a backflush for subcontracting. If you set backflush based on BOM, the system will consume raw materials even though you have not transferred materials against the Subcontracting Order and have enough stock at the supplier's warehouse. If you set backflush based on the "Material Transferred for Subcontract" system it will consume raw materials based on the materials transferred against the Subcontracting Order. If no stock transferred then no materials will be consumed at the time of Subcontracting Receipt. See: Subcontracting
Over Transfer Allowance (%)
Percentage you are allowed to transfer more against the quantity ordered. For example: If you have ordered 100 units. and your Allowance is 10% then you are allowed to transfer 110 units.
Auto Create Subcontracting Order
Subcontracting Order (Draft) will be auto-created on submission of Purchase Order.
Auto Create Purchase Receipt
Purchase Receipt (Draft) will be auto-created on submission of Subcontracting Receipt.
Portal Settings
The various fields on the Portal Settings screen are explained below:
Default Role at Time of Signup
Select a Default Role from the drop down list or choose to create a new Default Role by clicking on the Create a new Role option. This will be the Role that will be applied to the user the moment he logs in to the Portal.
Default Portal Home
Specify the default landing home page of the portal
Hide Standard Menu
Check this box to hide the standard menu from the portal page.
Portal Menu
Use the Portal Menu Template to manage and control the Portal Menu Items.
Custom Sidebar Menu
Use the Custom Menu Template to manage and control the Custom Sidebar Menu Items.
Domain Settings
The various fields on the Domain Settings screen are explained below:
Manufacturing
Check this box if your company is into manufacturing. Domain refers to a specified sphere of activity a company operates in. A company is a legal entity made up of an association of people for carrying on a commercial or industrial enterprise. In iVendNext, the first Company is created when an iVendNext account is set up. For each Company, you can set a domain as manufacturing, retail, or services depending on the nature of your business activity.
Retail
Check this box if your company is into retail. Domain refers to a specified sphere of activity a company operates in. A company is a legal entity made up of an association of people for carrying on a commercial or industrial enterprise. In iVendNext, the first Company is created when an iVendNext account is set up. For each Company, you can set a domain as manufacturing, retail, or services depending on the nature of your business activity.
CRM Settings
The CRM settings are spread across the following subsections:
Lead
Opportunity
Quotation
Other Settings
Lead
The various fields under the Lead section are explained below:
Campaign Naming By
It ensures consistency in the naming convention used by the organization by automatically generating names for new campaigns based on predefined rules or patterns. It helps users create and maintain unique campaigns and track their effectiveness. A Campaign is a full-scale implementation of a sales strategy to promote a product or service. This is done in a market segment of a particular geographical area to achieve specific objectives. When a marketing campaign generates a lead or an opportunity, you can tag the campaign while creating the Lead or Opportunity. You can also tag the campaign in Quotation.This helps in assessing the effectiveness of a marketing campaign by calculating the return on investment.
Allow Lead Duplication based on Emails
If this is enabled, the system will allow users to create multiple leads with the same email address at the same time.
Auto Creation of Contact
The system will automatically create a new Contact on creation of a Lead.
Opportunity
The various fields under the Opportunity section are explained below:
Close Replied Opportunity After Days
Specify the number (In Days) after which you the Replied Opportunity to automatically close. If there are many Opportunities having a status other than Open, then they will be auto-closed after the no. of days mentioned in this field if there is no action.
Quotation
The various fields under the Quotation section are explained below:
Default Quotation Validity Days
Specify the number of days you want a Quotation to remain valid. You can configure quotations to the customer to be valid only for certain days. In the Quotation, you can update Valid Till Date manually. By default, the Valid Till date is auto-set as 30 days from the Quotation's Posting Date. You can change the no. of days in this field as per your business case.
Other Settings
The various fields under the Other section are explained below:
Carry Forward Communication and Comments
Check this box to allow copying of all the Comments and Emails from an existing document to another newly created document throughout the CRM documents. Here, the document refers to a Quotation. (Lead -> Opportunity -> Quotation) If this is enabled, When converting a Lead into Opportunity and Opportunity to Quotation, the system will auto copy the emails and comments from the source document.