Store Landing Page
After enabling Shopping Cart for your app you can create a custom landing page for your store using the Web Page Builder.

Custom Store Landing Page
1. How to create a Custom Store Landing Page
- Follow the steps mentioned here to create a Web Page.
- Set a Route for your page (eg. /store).
- Select Content Type as Page Builder.
- Click on Add Row in the Page Building Blocks Table.
- Select a Web Template.
iVendNext comes with a great set of standard web templates that can be used to create your Web Page.
Store Page Building Blocks 6. Add Values.
Click on the Edit Values button on the right of each block, and enter the values in the dialog to set the content for each section.
The Web Templates that will be useful for building your store landing page are:
* **Hero Slider:**
Up to 5 slides can be created. The image, title, primary action, alignment, theme for each slide
is configurable.
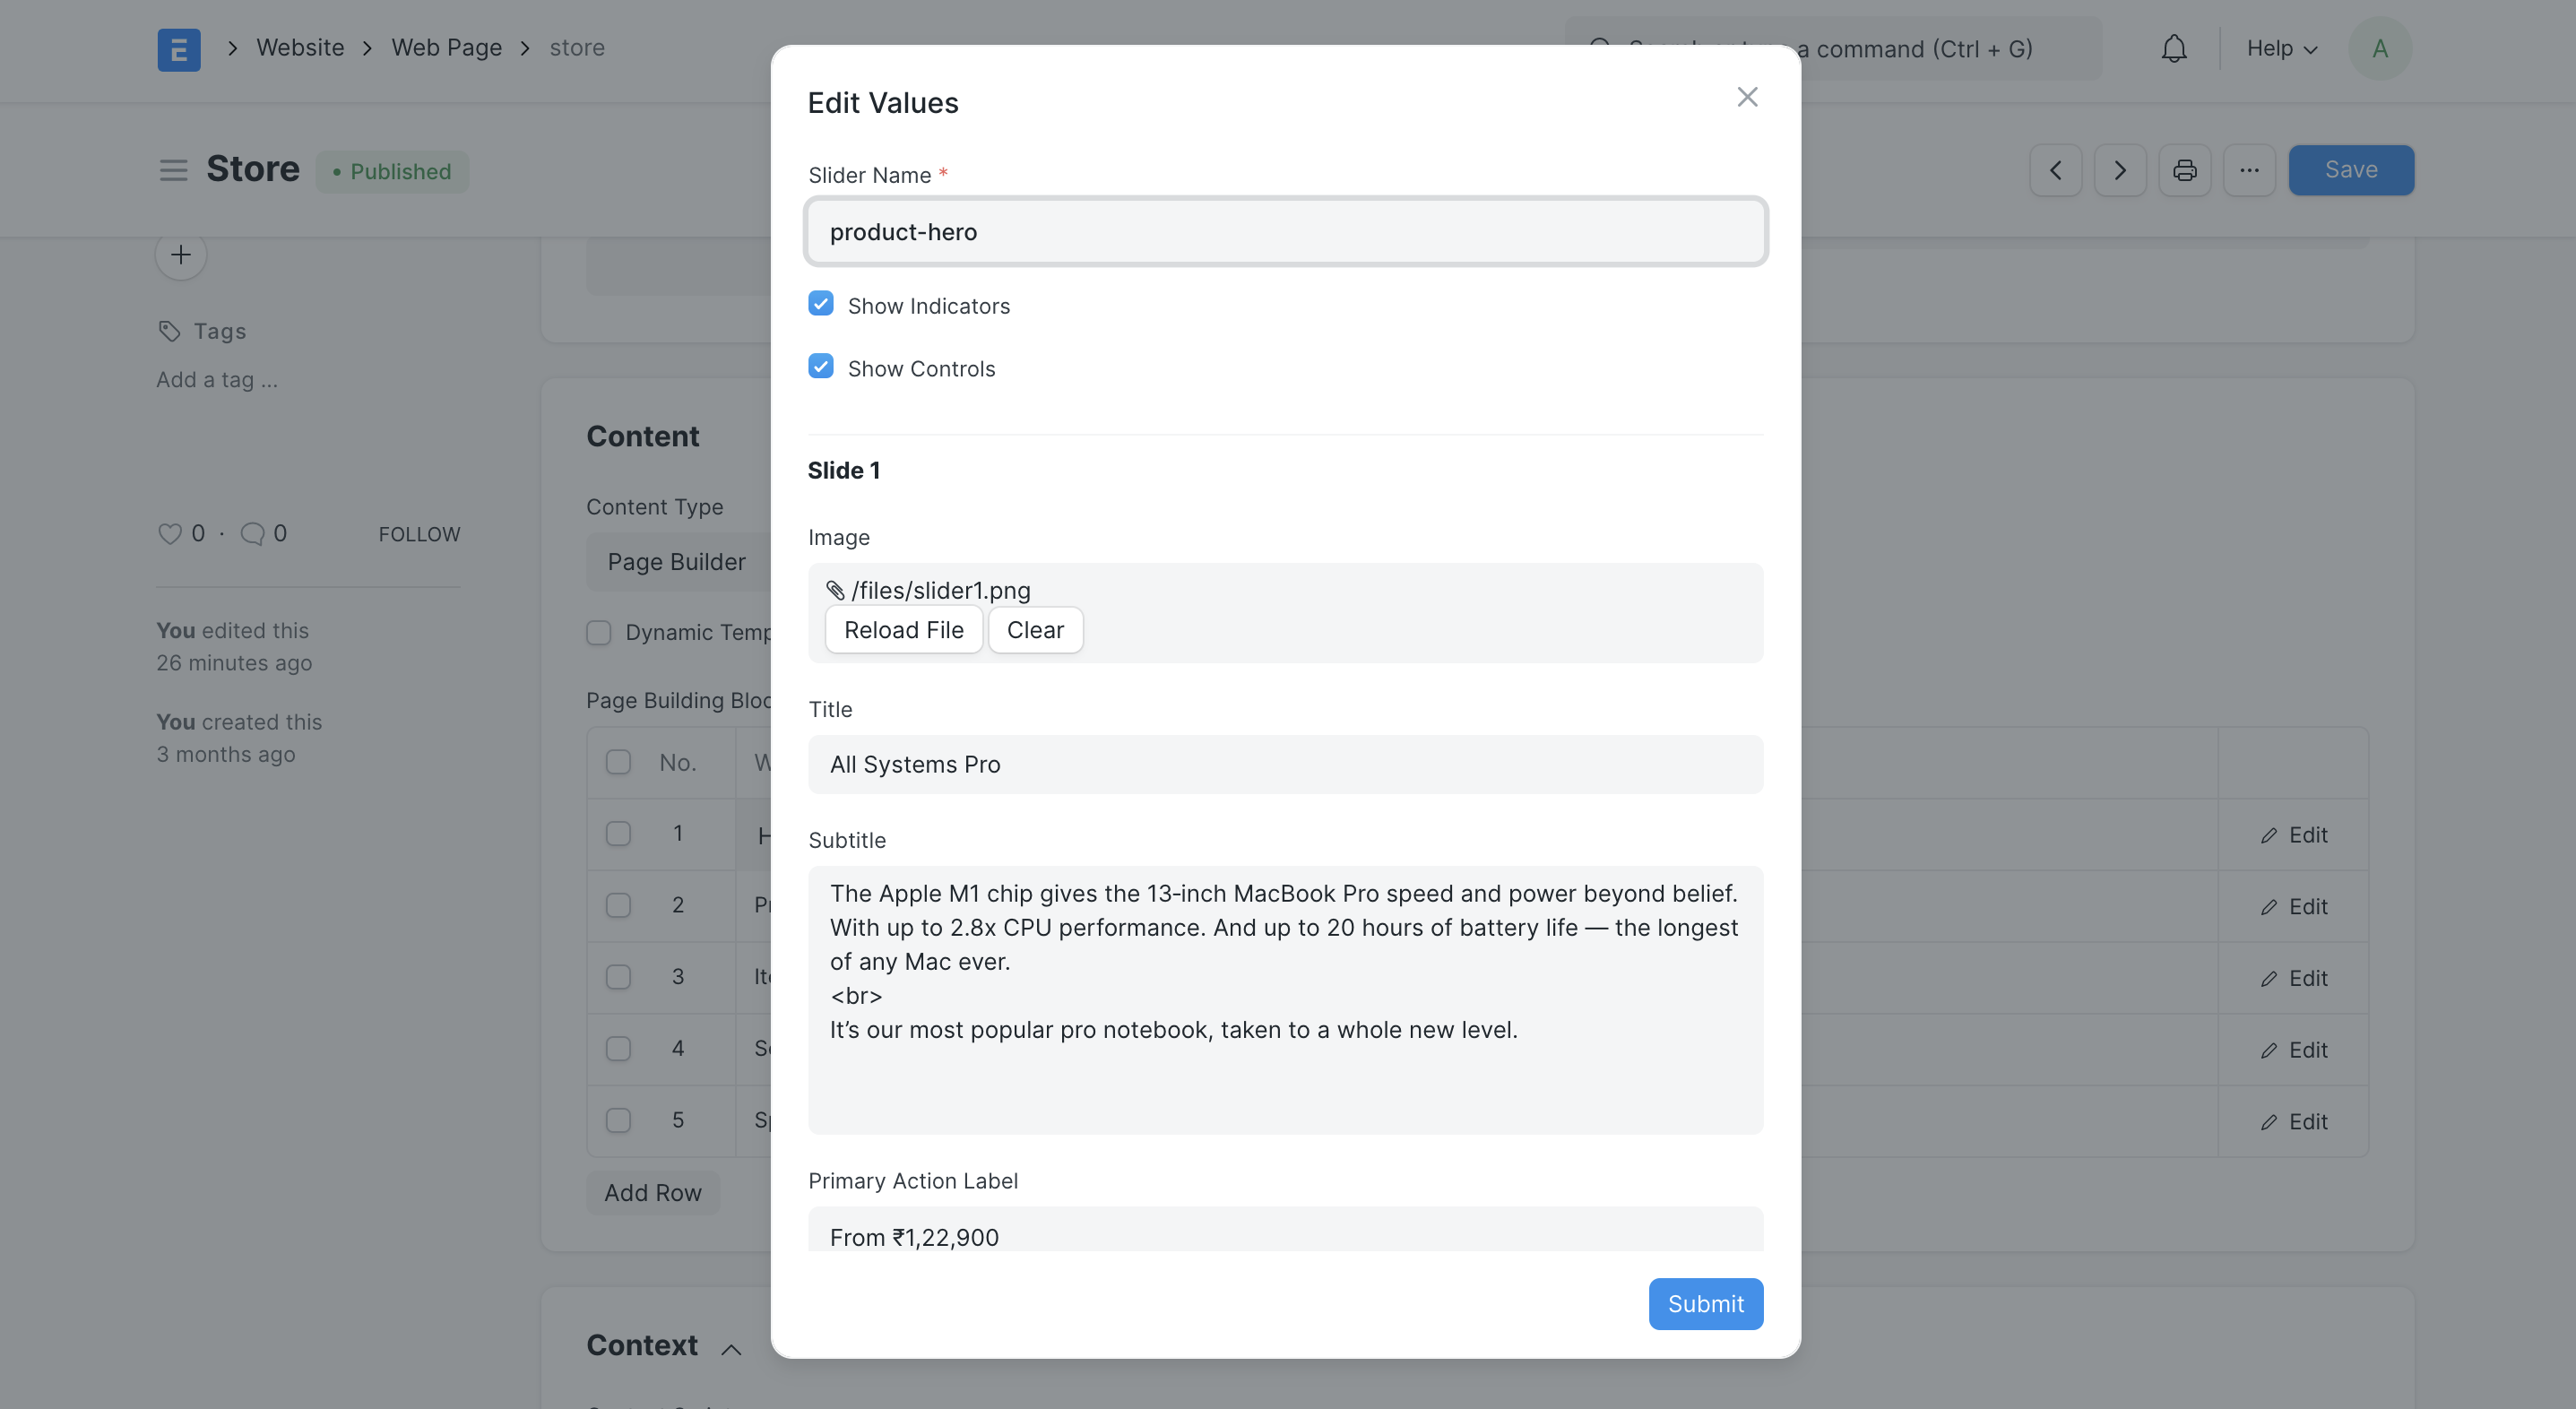
*Hero Slider Configuration*
* **Product Category Cards:**
Up to 8 product category cards can be configured. Each product categories will link to an
[Item Group](/docs/user/manual/en/item-group).
Ensure that the **Show in Website** option is ticked in the Item Group form so that the
route for the product category is generated.
Product Categories Configuration
* **Item Card Group:**
This section can be used to showcase your featured items. Up to 12 cards can be configured.
Each card will link to an [Item](/docs/user/manual/en/item). If **featured** is checked,
the item will take up 2 columns of space.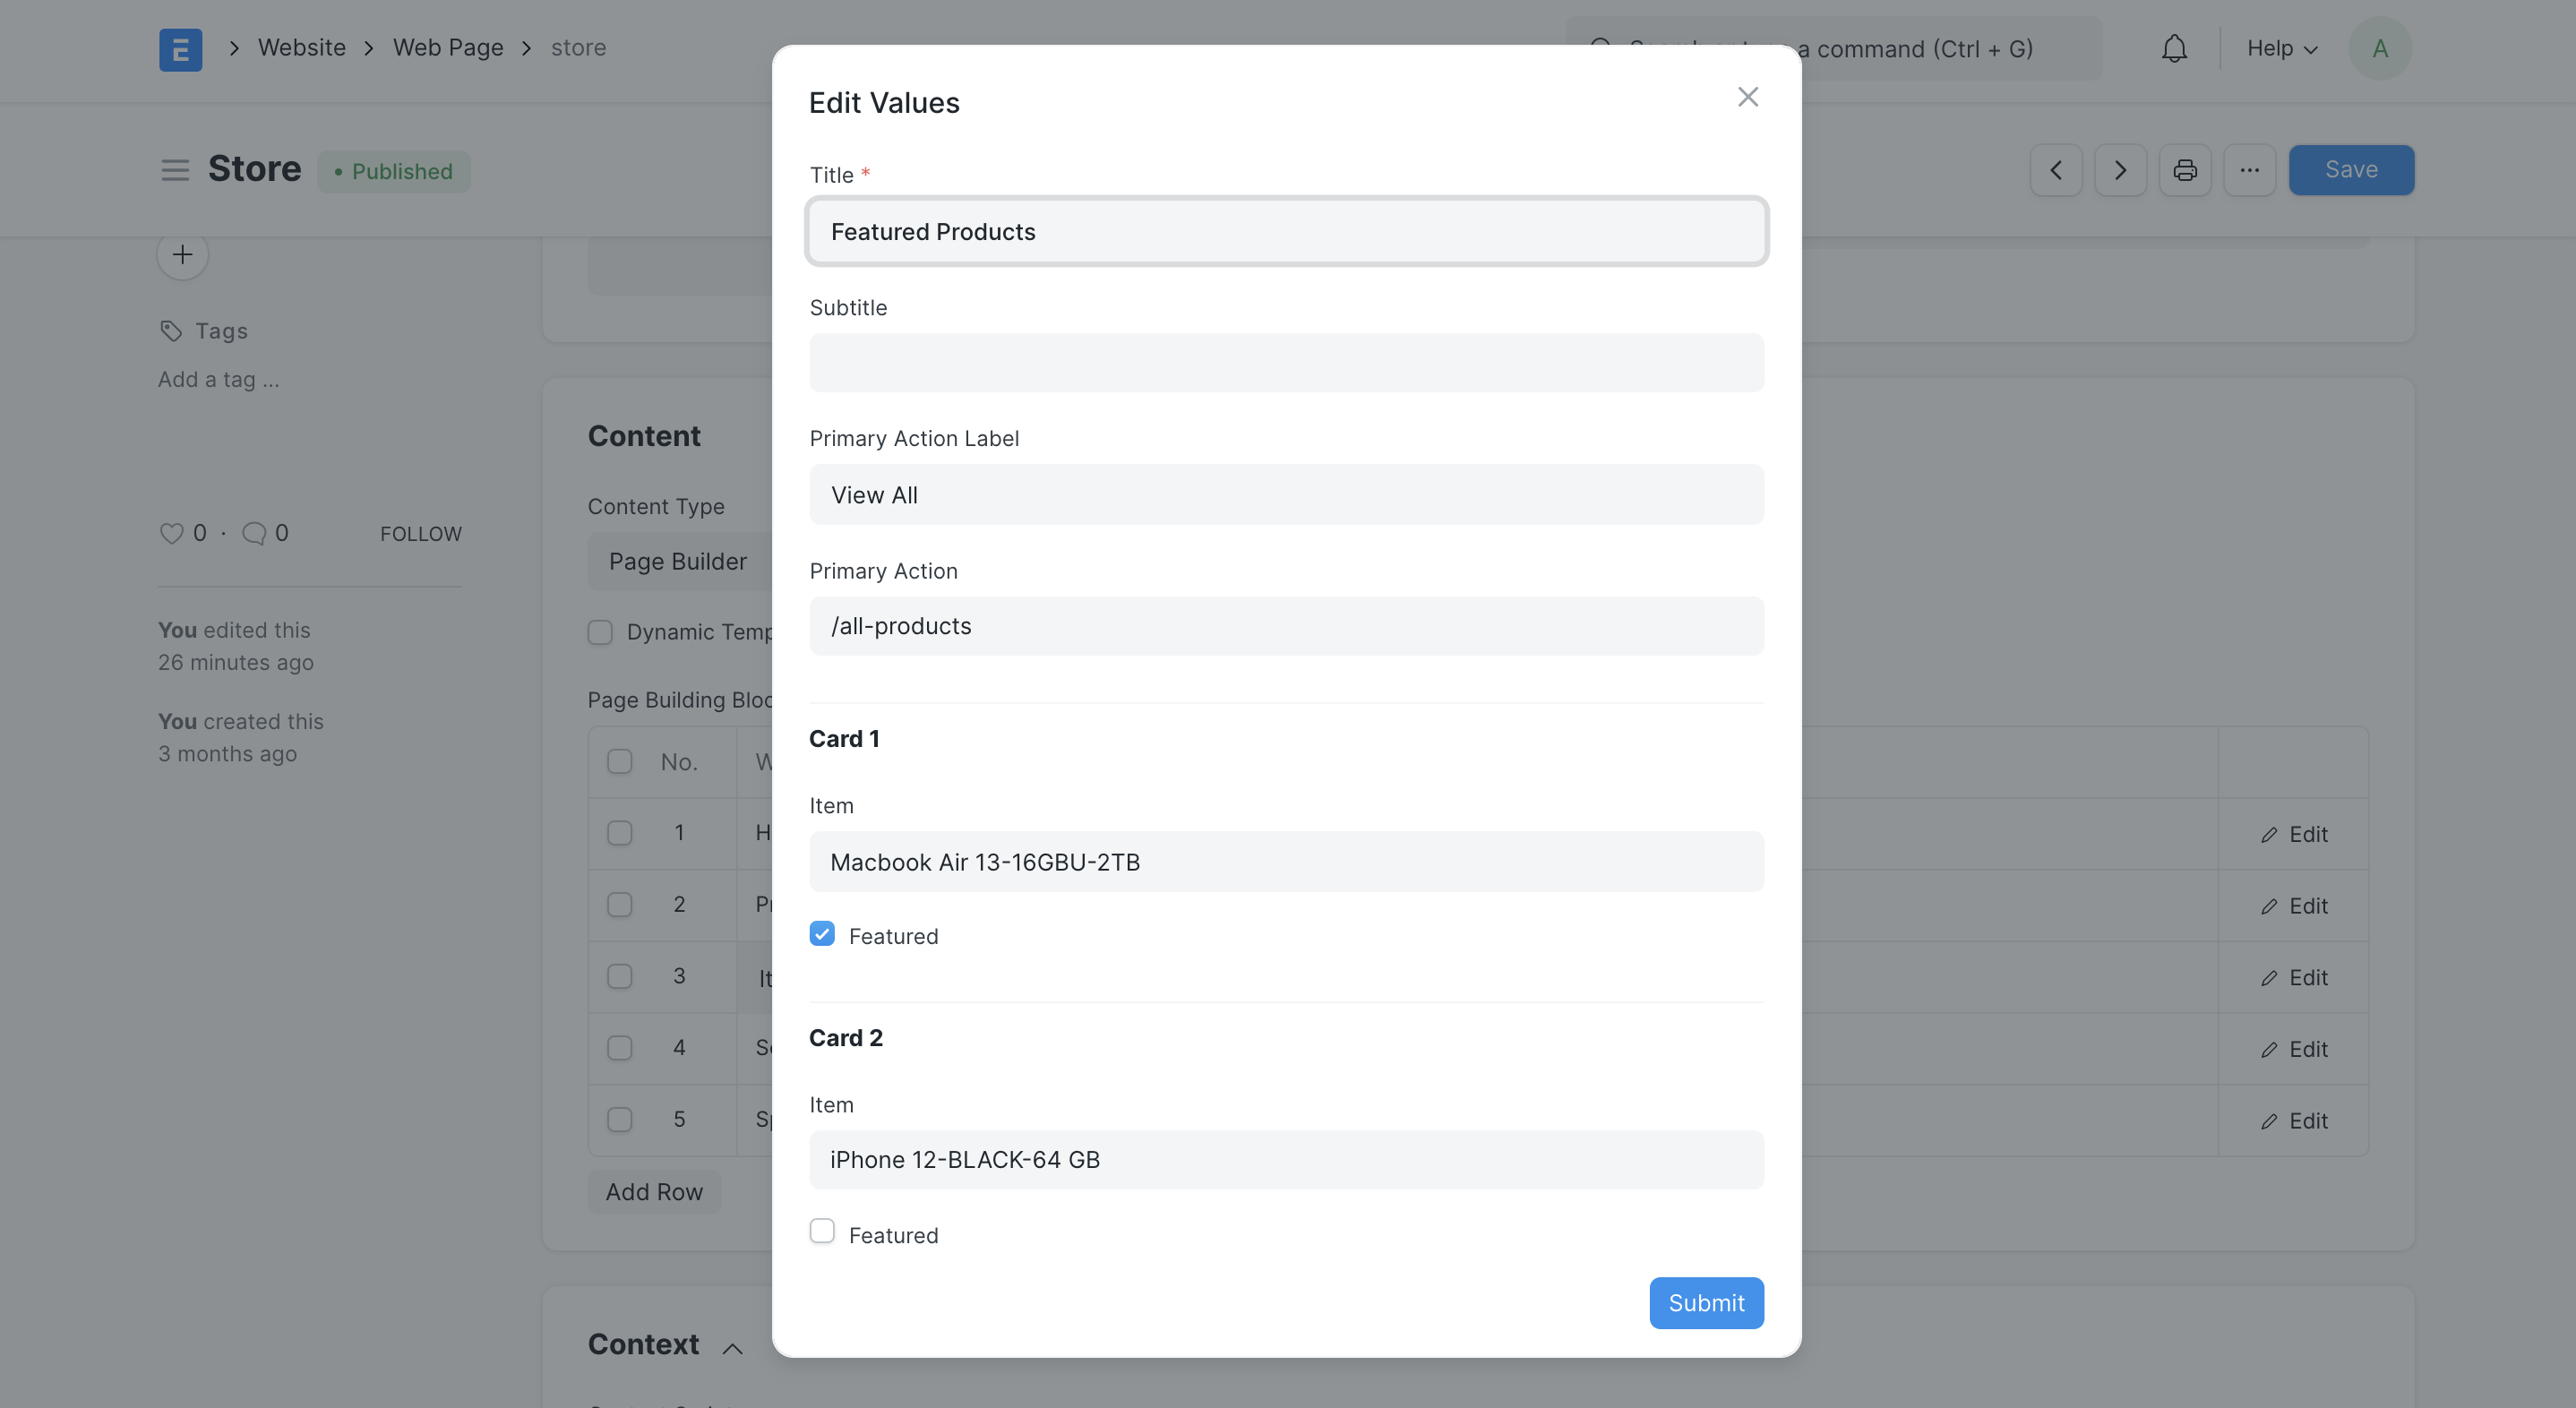
Item Cards Configuration 7. Publish your Web Page.
The web page will be published only when the Published option is checked. Once the page is published, click on See on Website on the sidebar or visit the configured route and check out the page!
Publish your Web Page
- Set as your Home Page.