Reason Code Master
Reason Codes are defined for capturing extra information on why a particular activity was performed at the POS. These reason codes must be enabled on the Retail Settings screen under the Reason Code Required Tab.
To access the Retail Settings, go to: Home > Retail. Then under the Settings section click on the Retail Settings shortcut. Click on the Reason Code Required tab on the Retail Settings screen.

Use the Reason Code Required section to define and set up reason codes for various POS related activities.
1. Prerequisites
There are no prerequisites as such before defining the Reason Codes.
2. Steps to setup Reason Codes
The Steps to setup Reason Codes are explained below:
Navigate to: Home > Retail. Then under the Stores Operations section click on the Reason Code shortcut. This will open the Retail Code Master screen.

Click on the Add Reason Code Master button. This will take you to the Reason Code List View screen.

Fill in the required information including the mandatory fields on the New Reason Code Master screen click the Save button, to save the data and exit the screen.
This will create a new Reason Code and can be seen on the Reason Code List View screen. We have created some Reason Codes for illustration as shown in the image below.
3. New Reason Code Master Screen Explained
The various fields on the Reason Code Master screen are explained below:
ID
Specify the Reason Code ID.
Description
Specify the Reason Code Description.
Reason Type
Select the Reason Type from the drop down list.
Is Active
Check this box to mark the Reason Code as active. Only those Reason Codes can be used at the POS which are marked as active.
Comment Required
Check this box to enable the comments. When this option is enabled, the cashier will have to specify a comment for the reason code selected.

4. POS Reason Code Implementation
We have already covered how to define and set up Reason Codes. Let us consider the following example to illustrate how a Reason Code is implemented on the Point of Sale.
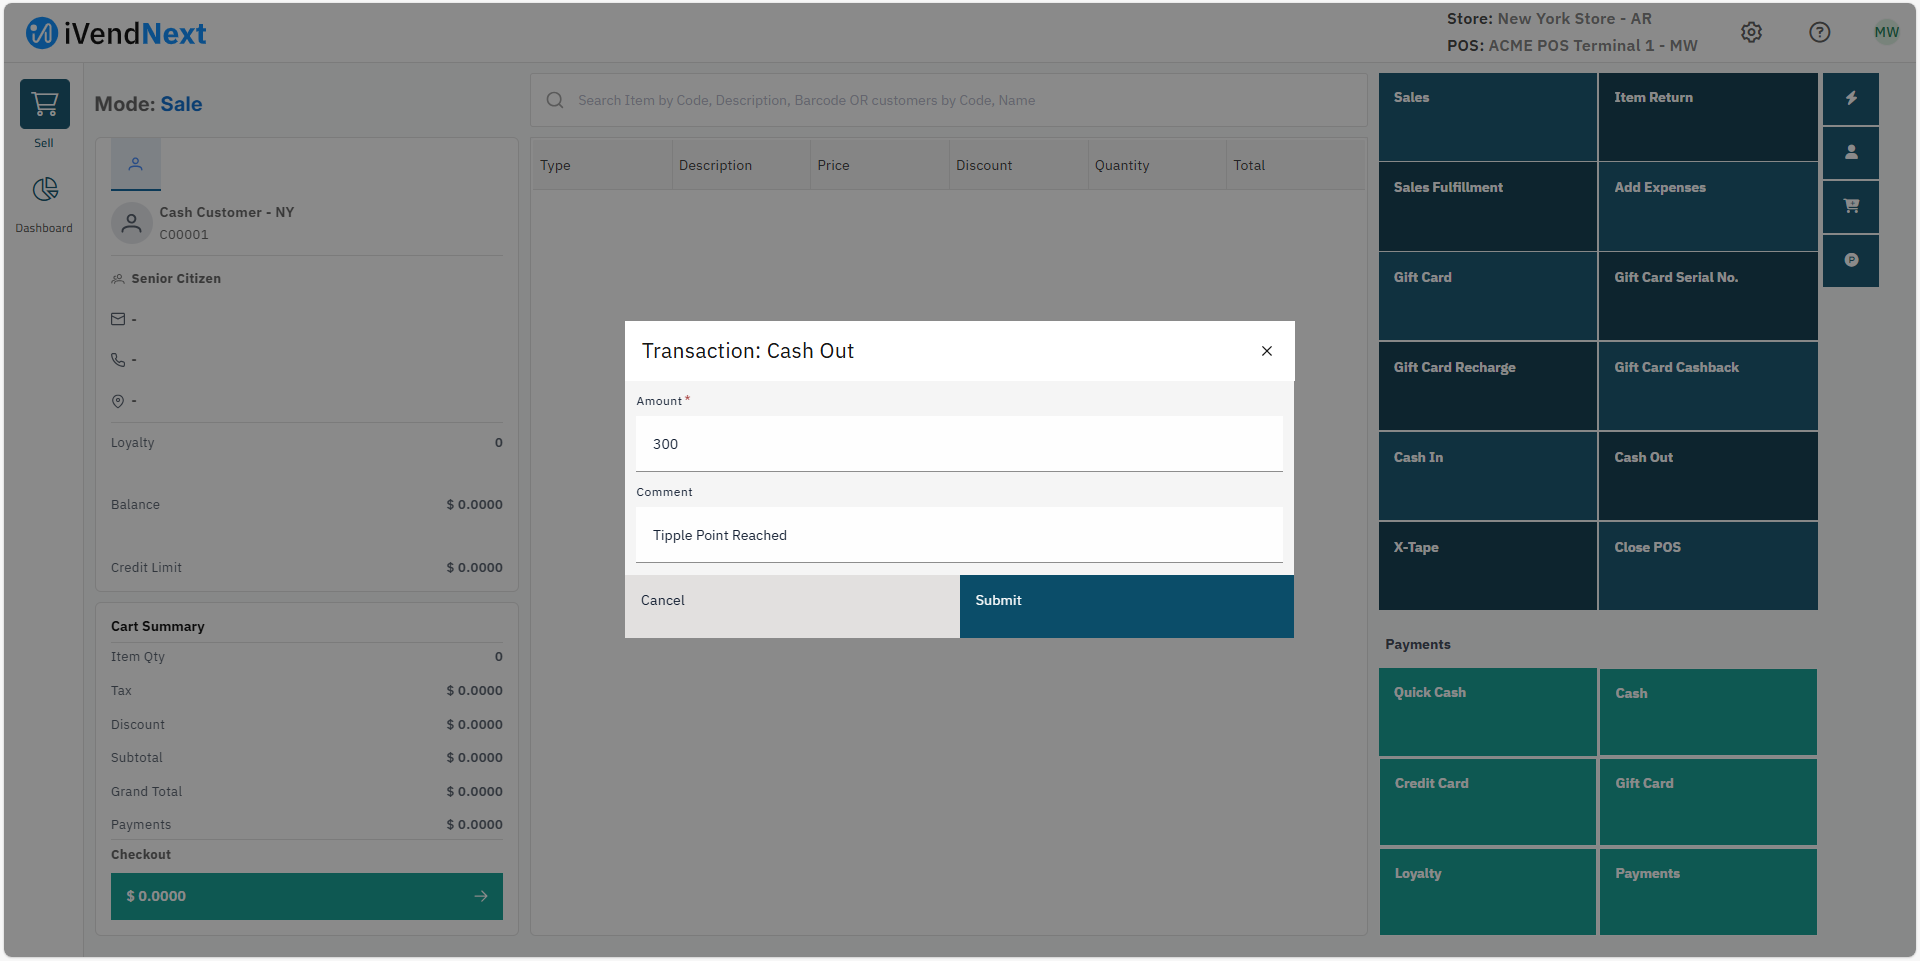
It is very common for the Cash Drawer to reach its tipple point before day end and the cashier is bound to take out some cash from the cash drawer. The application allows the cashier to use the Cash Out feature in iVendNext to take out cash.
We have already enabled the Cash Out reason code on the Reason Code Required screen.

Navigate to: Home > Retail. Click on the iVendNext POS shortcut. This will open the iVendNext POS screen. On the Transaction Screen select the Miscellaneous option.
Click the Cash Out Tile. This will open the Cash Out pop up screen where you will have to specify the Cash Out Amount, select the Reason Code from the drop down list, and enter a comment.