Print Settings
Introduction
Print Settings allow you to set your printing preferences like Paper Size, Default Text Size, Print Output Type such as PDF or HTML, etc. Since iVendNext is a browser-based application, the actual print command is executed by the browser you're using and a lot depends on your default browser settings.
Access Print Settings
To access Print Settings, go to:
Home > Settings > Print Settings
There are various configurations available in the Print Settings. Let's learn about them.
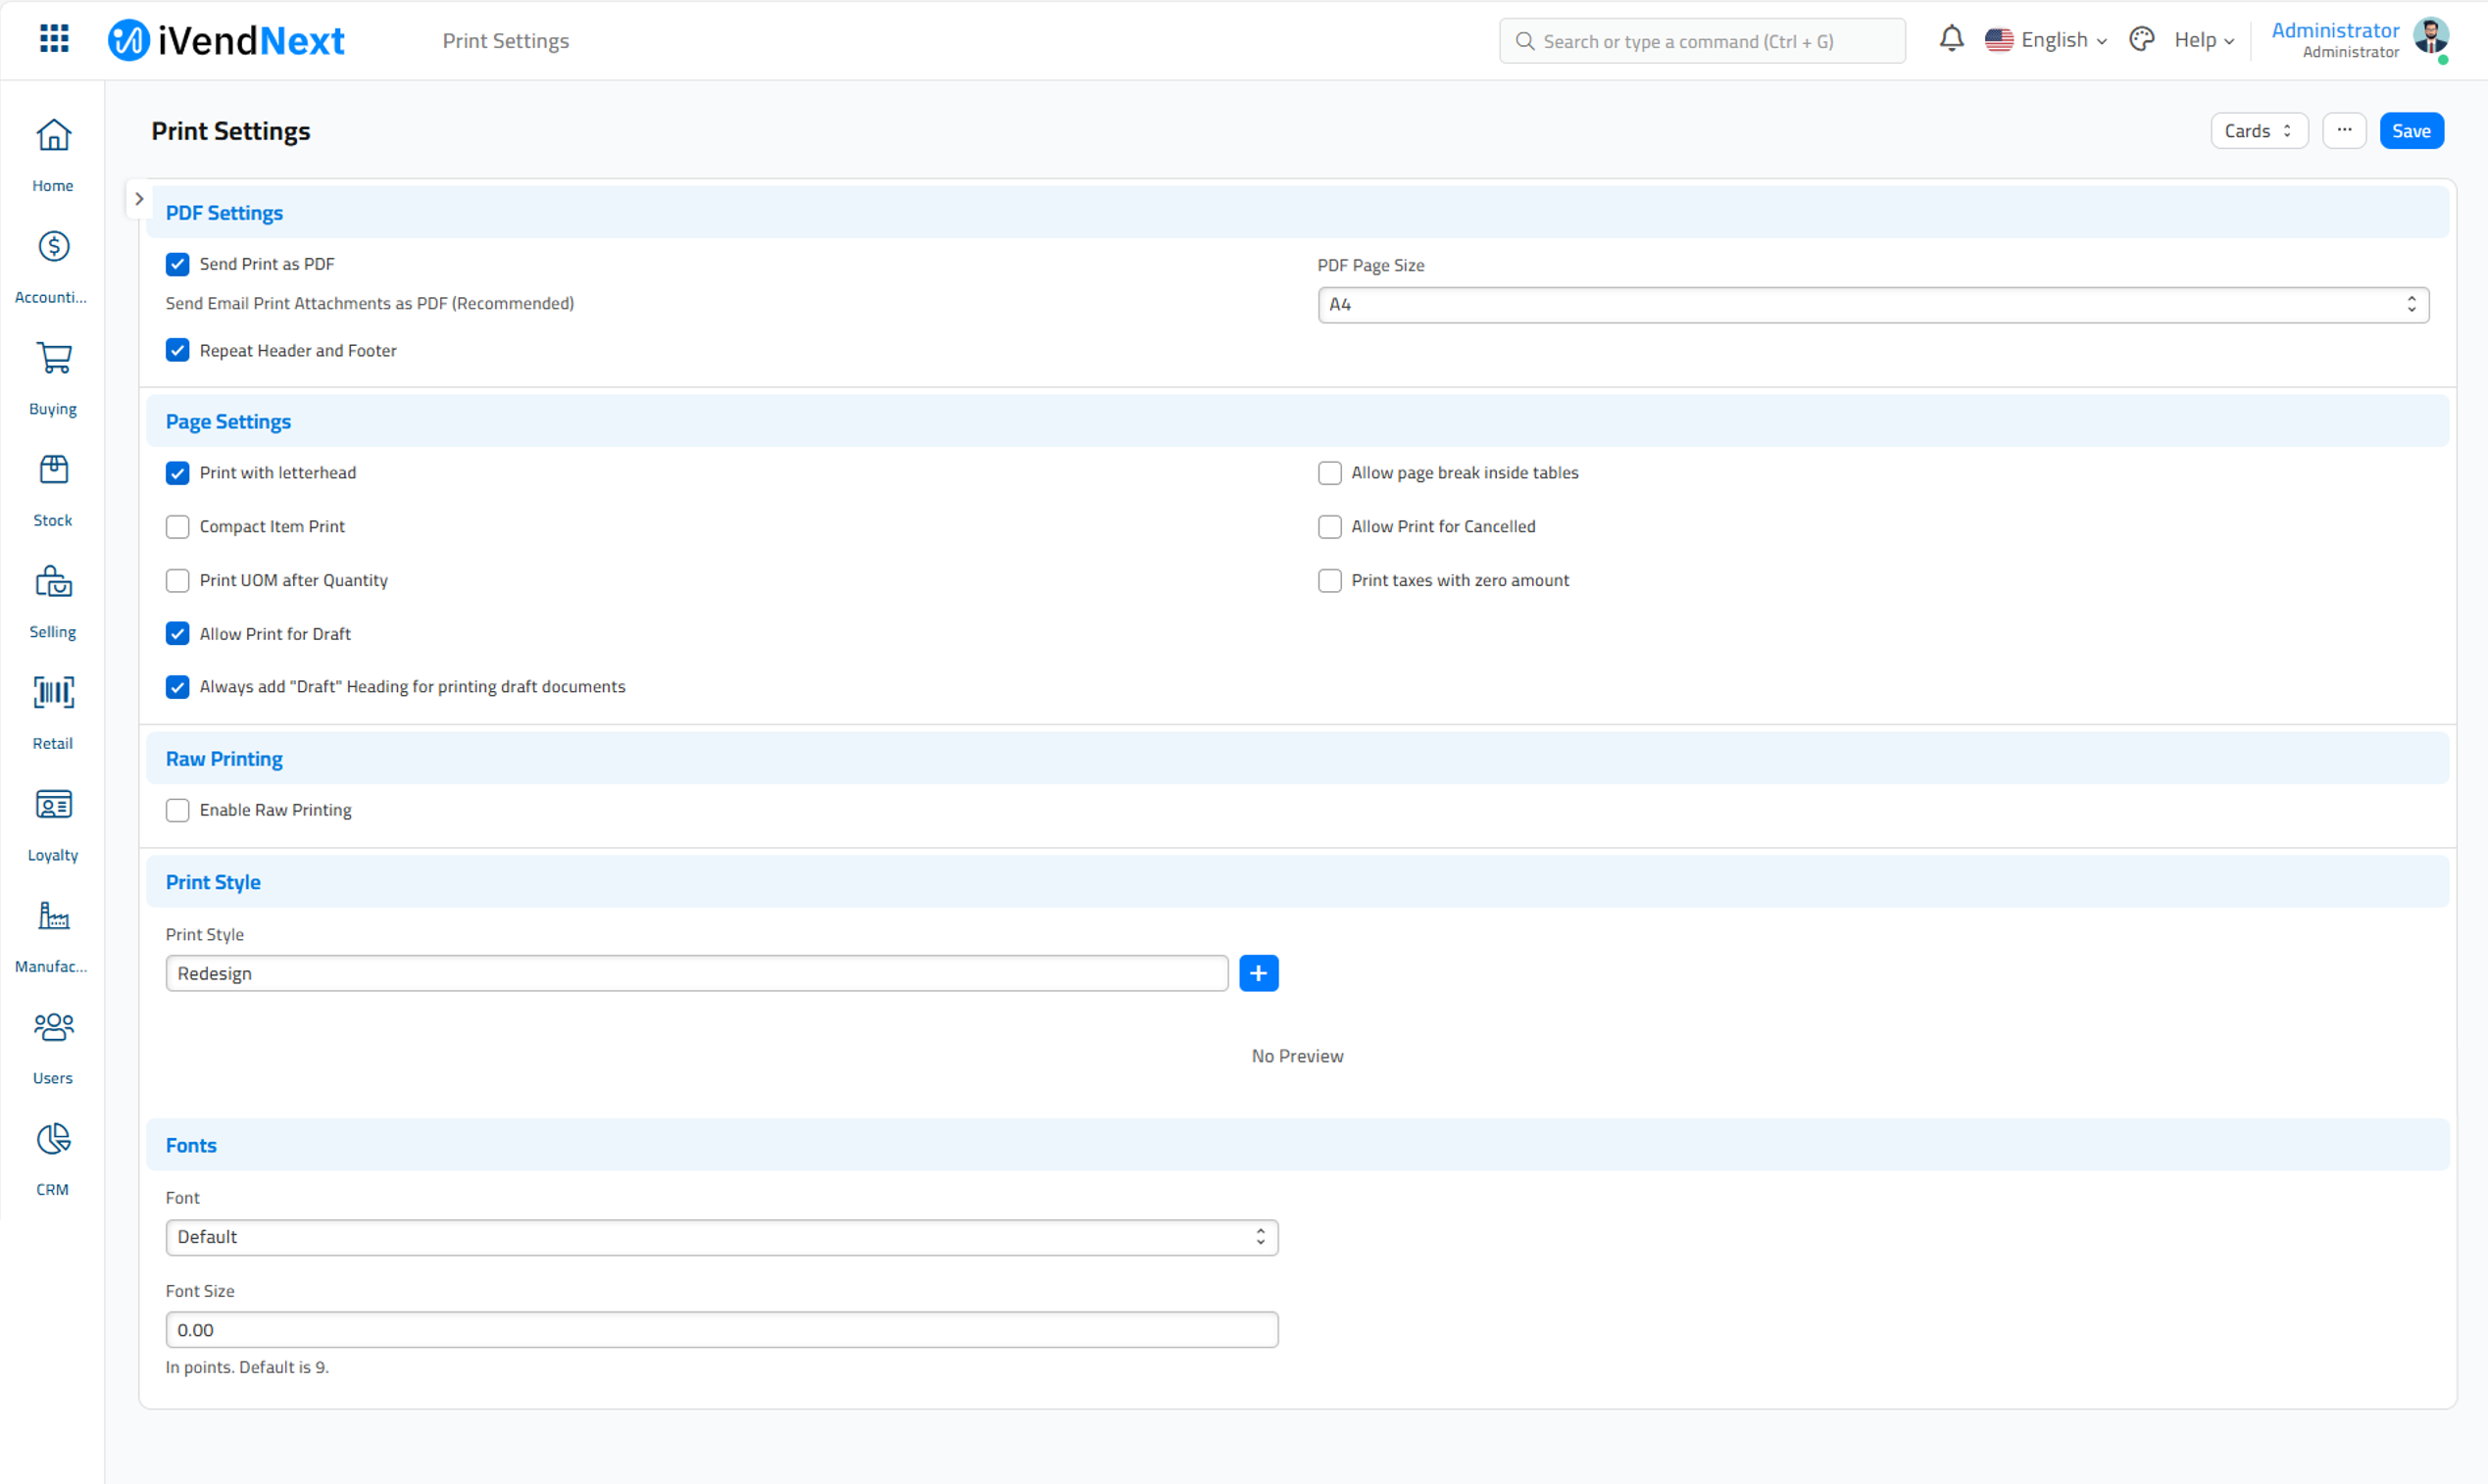
Print Settings Screen
The information on the Print Settings screen is organized into sections. Each section contains information specific to the section it corresponds to.
PDF SEttings
Page Settings
Raw Printing
Print Style
Fonts
The various settings on the different sections of the Print Settings Screen are explained below:
PDF Settings
This section of the Print Settings screen contains settings and controls related to PDF documents.
Send Print as PDF
Check this box if you want to Send Email Print Attachments as PDF (Recommended). If unchecked the Email Print Attachments will be sent in the HTML format. When you email any document (like Sales Order/Invoice) from iVendNext, it is sent in the PDF or HTML format. The file is sent in PDF by default. However, if you wish to send a document in the HTML format, just uncheck the option "Send Print as PDF".
Repeat Header and Footer in PDF
Check this box if you want the Header and Footer to be added to each page that you print. The letterhead is a master where you can define the standard Header and Footer which is appended to the document's Print Format. If this property is enabled, then Header and Footer are added to each page. If you don't want header and footer repeat on each page, just disable this setting.
PDF Page Size
Select the default Page Size of the PDF document to be printed from the drop down list. The default size for printing PDF pages is A4. See: PDF Page Size options
Page Settings
This section of the Print Settings screen contains settings and controls related to
Page settings.
Print With Letterhead
Check this box to automatically tick the Letterhead option when printing a document. Note that you need to either set Letterhead as default or select one in the transaction for it to appear in the print view.
Compact Item Print
Check this box to enable the Compact Item Print feature. Transactions like sales orders/invoices have a table detailing items bought or sold. It has multiple columns like Item Name, Description, UoM, Rate Amount, etc. If there are many columns in the Item table, then the Print Format looks a bit cluttered. You can improve the view of the table by enabling Compact Item Print.
As per this setting, there will be only four columns in the Print Format, namely: Description, Qty, Rate, and Amount.
The values of other columns (like name, description, image, serial nos. etc.) are concatenated in the Description column.
Print UOM after Quantity
Check this box if you want to print UOM after Quantity. UoM stands for Unit of Measurement. A UoM is a unit using which an Item is measured. A few examples of UoM are Numbers (Nos), Kgs, Litre, Meter, Box, Carton etc.
Allow Print for Draft
The documents (mostly transactions) have two stages of authentication, Save and Submit. The saved documents are the first draft and not submitted to the system. Hence printing is restricted for the documents at this stage. However, if you wish to permit users to print documents at the Draft stage as well, enable this checkbox.
Always add "Draft" Heading for printing draft documents
Enabling this setting also prints "Draft" in the Print Format, thus indicating that the document shared is not completely authenticated yet.
Allow Page Break Inside Table
If an item's description captures more than usual space of a page, then enabling this setting will split the item's details to the next page. Hence, a page break will be inserted between the Item Description, and the rest of the details will be pushed to the next page.
Allow Print for Canceled
Canceled transactions are the ones which don't have any impact on the reports. If you wish to allow printing for the canceled transactions, then enable this setting. A transaction can be canceled only once it is submitted.
Print Taxes with Zero Amount
In the sales and purchase transactions, you can apply multiple taxes on the item. By default, in the print format, only taxes which have some amount calculated are visible. If you wish to also print the tax which was not applied and has zero tax amount, enable this setting.
Raw Printing
Check this box if you want to enable Raw Printing and print to many supported thermal printers. Sending a string of commands to a printer directly in its native language is called Raw Printing. Many thermal printers need these raw commands sent to them in order to perform functions like barcode printing, receipt printing, label printing, etc. Raw Printing bypasses the printer's drivers in most cases, making them very fast and reliable. Raw Printing is also capable of doing some advanced features such as cutting receipt paper, kicking out cash drawers, etc. See: Raw Printing
Print Style
Select a Print Style from the drop down list or choose to create a new Print Style by clicking on the create a new Print Style. 'Print Style' helps you define custom CSS styles which can be applied to Print Formats. iVendNext comes with preset styles for printing documents. You can also create new styles using CSS that can be applied to all your print formats. The standard print Styles in iVendNext are: Monochrome, Modern, Redesign and Classic. See: Print Style
Fonts
This section of the Print Settings screen contains settings and controls related to
Font settings.
Font
Select the Font Type from the drop down list. In the past, the word “font” specifically denoted a particular size and style within a typeface. For instance, Comic Sans MS represented a typeface, and Comic Sans MS 16px bold was considered a specific font. However, over time, the terms “font” and “typeface” have become interchangeable. Major companies like Apple, Google, Microsoft, now use “font” to describe a typeface.
Font Size
Specify the Font Size. You need to specify the size In points. The default is 9.
Network Printer / Print Server
You can enable the print server by filling the print server IP and port. Then choose the default printer. Before enabling this feature you have to install the pycups library.
Install cups
You may need first to install cups library if is not already on your system
For Debian OS Family:
sudo apt-get install libcups2-dev
For Red Hat OS Family:
sudo yum install cups-libs
Install pycups
After that, install pycups in the env using the command:
./env/bin/pip install pycups
This is executed from the ivendnext-bench directory.