Store Expense Type
Introduction
Expense in simple words is the cost incurred to run your retail business. It includes expenses incurred at the Store and POS. Broadly speaking, all your expenses can fall into one of the following categories:
Fixed:
These expenses remain fixed (same) over accounting periods. Examples include Premises Rent or Insurance Installments.
Variable:
These expenses change throughout the accounting period. Examples include Utility Bill Payments, Transportation costs etc.
Periodic:
These expenses happen occasionally and may fall across different accounting periods. Examples include Equipment Repairs and annual bonuses.
To access the Retail Settings, go to: Home > Retail.
Then under the Store Operations section click on the Store Expense Type shortcut. This will take you to the Store Expense Type List View screen.
1. Prerequisites
Before creating and using Store Expense Types, it is advisable to allocate a separate account to record and keep a track of your expenses. Chart of Account is a tree structure master which allows users to define parent and child relationship between accounts. Account types are mainly classified as income, expense, asset, or liability. These account types represent your accounting transactions over a period and help you segregate and filter out cash flow, expenses, and inventory.
2. Steps to add a Store Expense
The Steps to setup Store Expense are explained below:
To access the Retail Settings, go to: Home > Retail.
Then under the Store Operations section click on the Store Expense shortcut. This will take you to the Store Expense List View screen.
Click on the Add Store Expense button. This will take you to the New Store Expense screen.
Fill in the required information including the mandatory fields on the New Store Expense screen click the Save button, to save the data and exit the screen.This will create a new Store Expense and can be seen on the Store Expense List View screen.
We have recorded some Store Expense Types for illustration as shown in the image below.
2. Steps to create a Store Expense Type
The Steps to setup Store Expense Type are explained below:
To access the Retail Settings, go to: Home > Retail.
Then under the Store Operations section click on the Store Expense Type shortcut. This will take you to the Store Expense Type List View screen.
Click on the Add Store Expense button. This will take you to the New Store Expense screen.
Fill in the required information including the mandatory fields on the New Store Expense screen click the Save button, to save the data and exit the screen.
This will create a new Store Expense and can be seen on the Store Expense List View screen.
We have created some Store Expense Types for illustration as shown in the image below.
3. New Store Expense Type Screen
The various fields on the New Store Expense Type screen are explained below:
Expense Type
Specify a name for the Expense Type. For example, Cleaning, Repairs, etc.
Accounts
Use the Accounts section to configure and manage the Expense Account defaults. You will have to click on the Add Row button displayed below the Accounts Template to add a new blank row. Click on the Pencil symbol under the Gear icon to open the Editing Row screen. On the Editing Row screen you can specify the required information.
No.
It represents the row number and is automatically incremented when a new row is created. This field is not editable.
Company
Select the Company from the drop down list. In case you don’t find your Company listed there, you can create one by clicking on the Create a New Company option. In iVendNext, the first Company is created when an iVendNext account is set up. For each Company, you can set a domain as manufacturing, retail, or services depending on the nature of your business activity.
Default Account
Select an Account from the drop down list. In case you don’t find a suitable account to record your expenses in the list, you can create one by clicking on the Create a New Account option. This account will be the default account to record all your Expenses.
Description
Specify a Description for the Store Expense Type.
Click the Save button, to save the data and exit the screen. This will create a new Store Expense Type and can be seen on the Store Expense Type List View screen.
We have just created a new Store Expense Type called “Pantry” which can be seen listed on the Store Expense Type List View screen.
4. Store Expense Type Implementation
We have already covered how to define and set up Store Expense Type. Let us consider the following example to illustrate how a Store Expense Type is implemented on the Point of Sale.
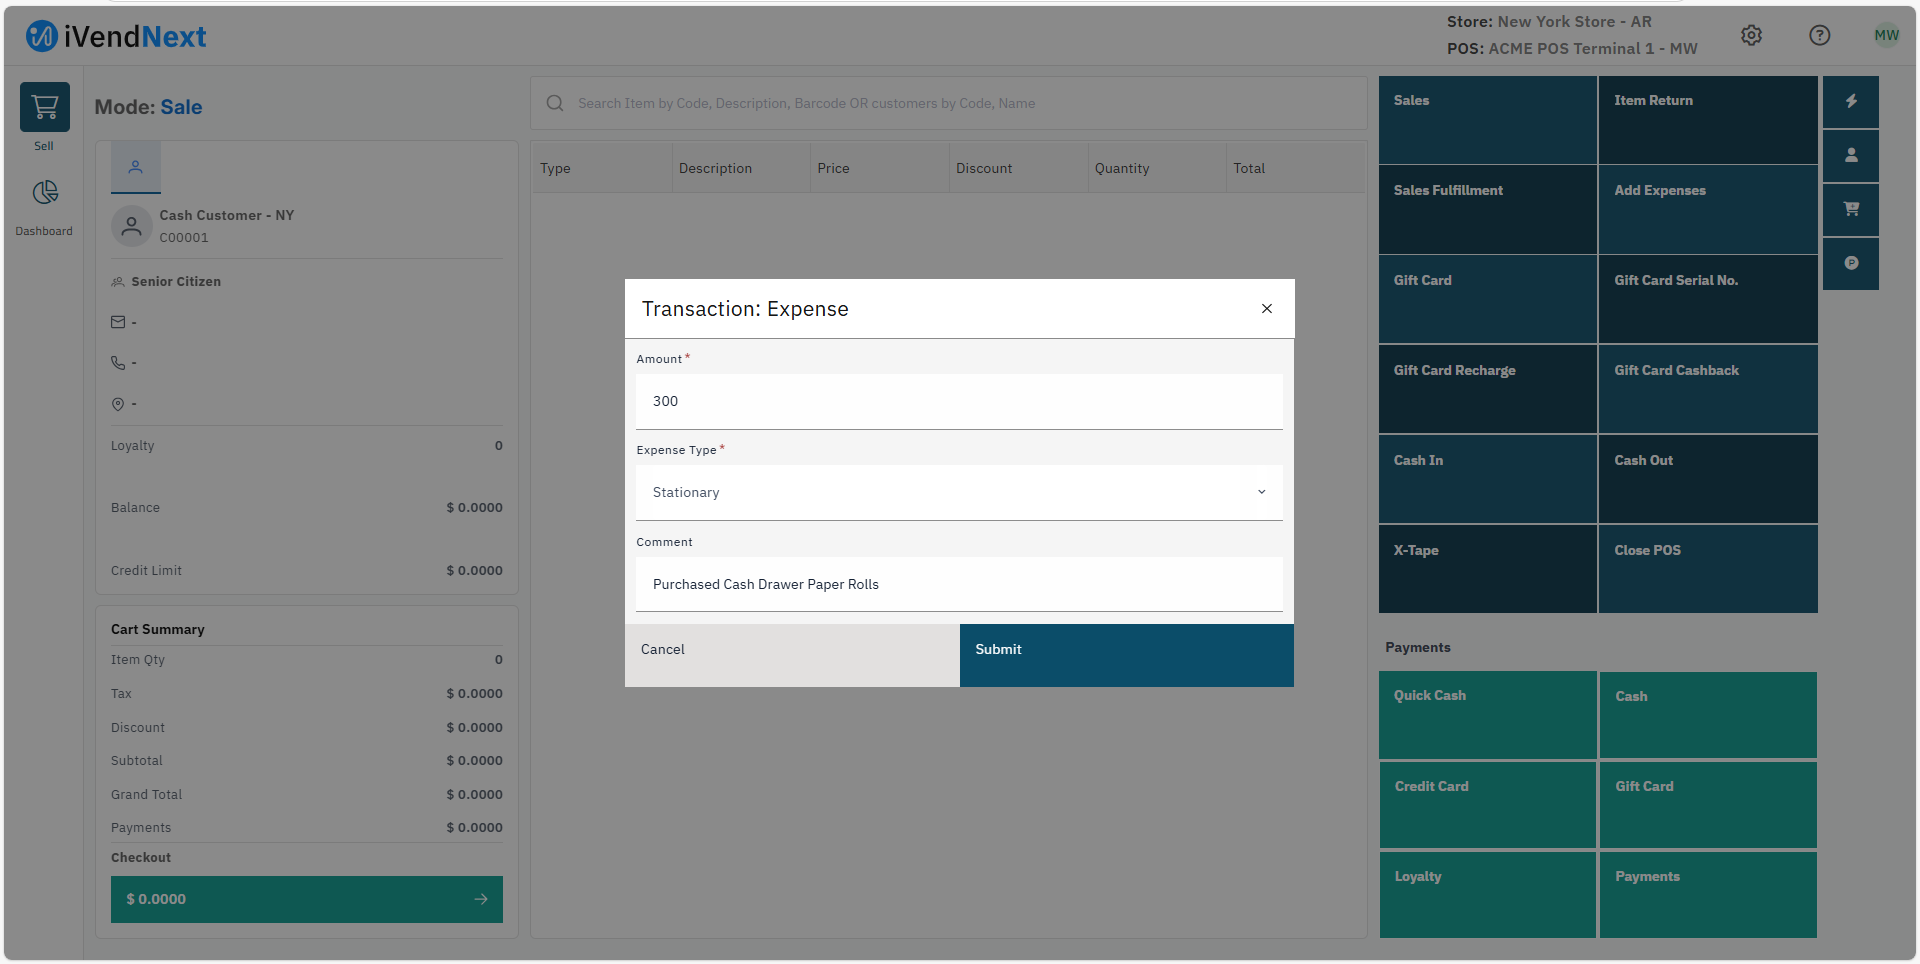
The application allows the cashier to use the Add Expense feature in iVendNext to record petty expenses incurred.
Navigate to: Home > Retail. Click on the iVendNext POS shortcut. This will open the iVendNext POS screen. On the Transaction Screen select the Miscellaneous Tab.
Click the Add Expense Tile. This will open the Transaction: Expense pop up screen where you will have to specify the Expense Amount, select the Reason Code from the drop down list, and enter a comment.
