Surcharge
Surcharge is the extra fee that the customer pays when purchasing an item. It is an additional charge that can either be added in a sales transaction or in a purchase transaction. Packing charges, Alteration or fitting charges, service charge for repairs, etc. are some examples of surcharges that can be applied on the sales transactions. Similarly, freight charges, handling charges, etc. could be applied on the Purchase transactions.
The Retail Price displayed on the POS screen generally includes the cost of the item and the profit margin but will not include the surcharge unless and until applied manually at the POS Terminal. In iVendNext you can levy a surcharge either at the Line Level or at the Transaction Level.

1. Prerequisites
Before creating and using Surcharges, it is advisable to create the following first:
Creating a New Surcharge in iVendNext
The application allows you to apply a Surcharge both at the Transaction Level and at the Line Level.
1. Transaction Level Surcharge
A transaction-level surcharge applies to the entire sale rather than individual items. Follow these steps to add a surcharge at this level.
Add Items:
Select and add items to the sale.
Select a Customer:
The default selection is a Walk-In/Cash Customer. If needed, update it to a specific customer.
Apply the Surcharge:
Click the "Add Sales Surcharge" button to initiate the surcharge at the transaction level.
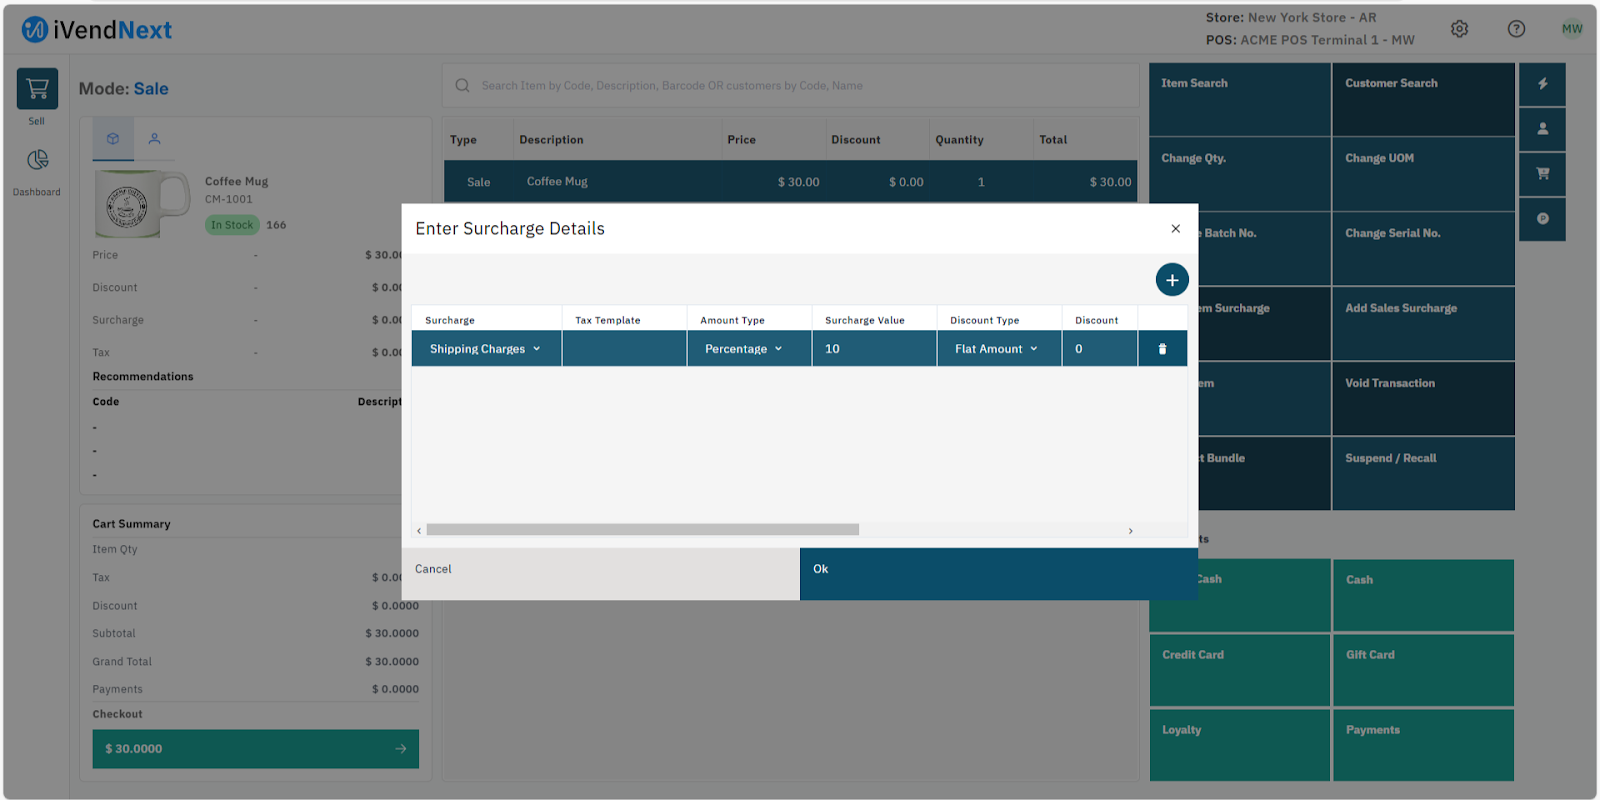
Enter Surcharge Details:
Fill in the required surcharge details in the "Enter Surcharge Details" screen.
Update the Surcharge:
Click the "Update Surcharge" button to confirm the changes.
Checkout:
Proceed to the payment screen.
Complete the Sale:
Select your preferred payment method and finalize the transaction.
Important Considerations
By default, the system selects a Walk-In Customer, also referred to as a Cash Customer.
To associate the sale with a specific customer, manually add the customer to the transaction.
2. Line Level Surcharge
A line-level surcharge is applied to individual items rather than the total transaction. Follow these steps to add an item-specific surcharge.
Add Items:
Select and add items to the sale.
Select a Customer:
The default selection is a Walk-In/Cash Customer. Update if needed.
Select Item for Surcharge:
Choose the specific item to which the surcharge will be applied.
Apply the Surcharge:
Click the "Add Item Surcharge" button to levy the surcharge at the item level.
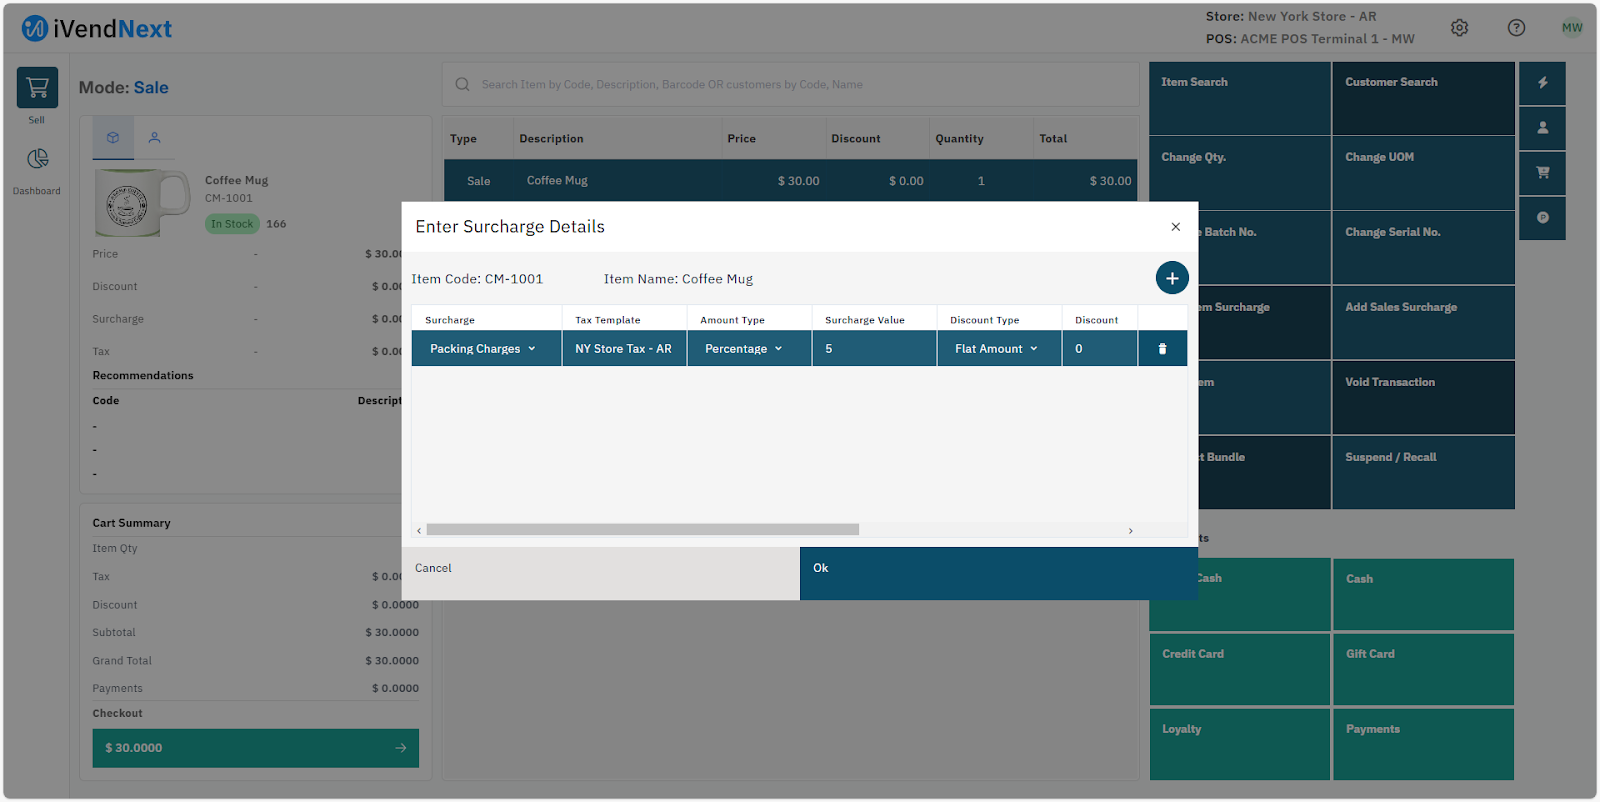
Enter Surcharge Details:
Provide the necessary surcharge information in the "Enter Surcharge Details" screen.
Update the Surcharge:
Click the "Update Surcharge" button to confirm changes.
Checkout:
Proceed to the payment screen.
Complete the Sale:
Choose a payment method and finalize the sale.
Important Considerations
The default customer selection is a Walk-In/Cash Customer.
To ensure the sale is recorded under a specific customer’s name, manually add the customer before proceeding.
3. New Surcharge Screen
The various fields of the New Surcharge screen are explained below:
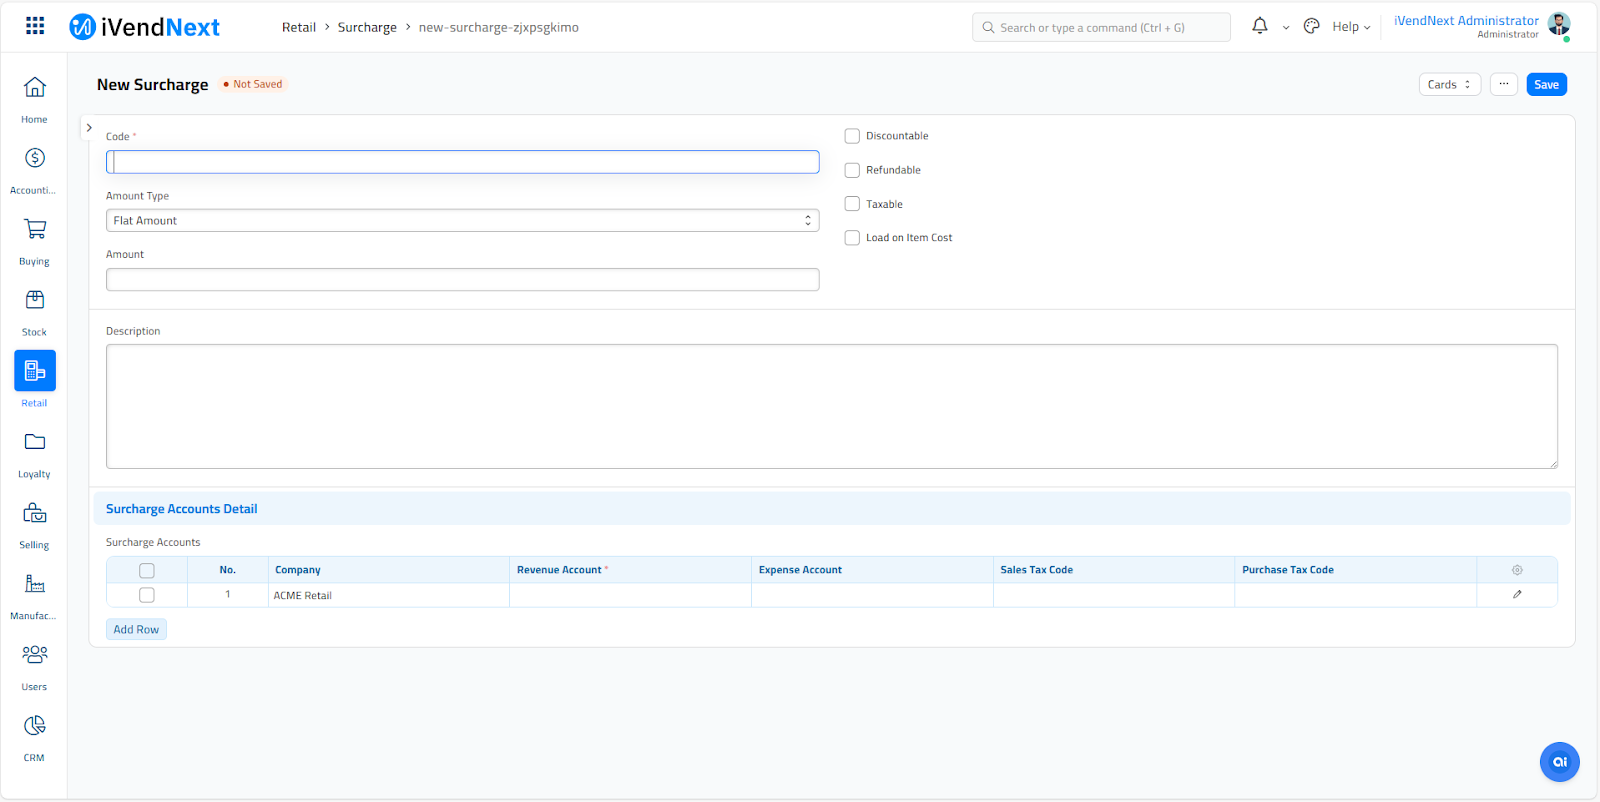
Code
Specify the Surcharge Code. This is a text field and is mandatory. Basically Code is nothing but a description of the surcharge attached. For example Freight, Handling Charge, Gift Wrap, etc
Amount Type
This field allows you to specify the Surcharge Type. You can specify how the Surcharge is applied. Your options are - Flat Amount or Percentage. This is a drop down field.
Amount
Specify the Surcharge Amount. This is a text field and relies upon the value set in the Amount Type field above.
Percentage
Specify the Surcharge Percentage. This is a text field and relies upon the value set in the Amount Type field above.
Discountable
Check this box if you want the discount offered to hold good on the Surcharge applied.
Refundable
Check this box if you want to allow the Surcharge to be refunded.
Taxable
Check this box if you want to allow the Surcharge to be taxable.
Load on Item Cost
Check this box if you want the Surcharge to be added to the Item Cost. Doing so will increase the Item Cost by this surcharge amount. This will affect the COGS value of the item.
Description
Specify the Surcharge description.
Surcharge Account Detail
This section of the New Surcharge Accordion allows you to manage your Surcharge Account. For example you can specify the Revenue and Expense accounts that you want to utilize with this Surcharge Account.
Click on the Add Row button displayed below the Surcharge Accounts section to add a new blank row. Click on the Pencil symbol under the Gear icon to open the Editing Row screen. On the Editing Row screen you need to specify the following:
Company
Specify the Company name. This field will auto populate with the company name. However, you do have the option to select a different company.
Revenue Account
Specify the Revenue Account you want to map with the Surcharge Account. You can either click on the Revenue Account field to select a Revenue Account from the drop down list or choose to create a new Revenue Account by clicking on the option Create a New (Revenue) Account. For example, if a customer opts to pay using a credit card, the retailer can add a surcharge to cover the processing fees levied by the Credit Card companies.
Expense Account
Specify the Expense Account you want to map with the Surcharge Account. You can either click on the Expense Account field to select an Expense Account from the drop down list or choose to create a new Expense Account by clicking on the option Create a New (Expense) Account.
Sales Tax Code
Specify the Sales Tax Code. You can either click on the Sales Tax Code field to select a Sales Tax Code from the drop down list or choose to create a new Sales Tax Code by clicking on the option Create a new Item Tax Template.
Purchase Tax Code
Specify the Purchase Tax Code. You can either click on the Purchase Tax Code field to select a Purchase Tax Code from the drop down list or choose to create a new Purchase Tax Code by clicking on the option Create a new Item Tax Template.