On Account Payments
This article describes how a transaction is handled in iVendNext where payment is made using On Account.
In iVendNext, "On Account" refers to a payment method where the amount due is recorded as a receivable on the customer's account instead of being paid immediately. Essentially, "On Account" is used for credit sales, meaning the customer is not required to pay at the time of purchase. Instead, the sale amount is deducted from their credit limit. This allows customers to buy items and services on credit, with the outstanding balance tracked in their account. The customer can settle this balance later based on the agreed payment terms.
For example, if a customer has a credit limit of $3,000 and purchases "On Account" for a transaction valued at $1,200, their remaining credit limit will be $1,800. This payment method is beneficial for businesses as it offers credit facilities to their customers, allowing them to enhance their financial stability and build customer relationships.
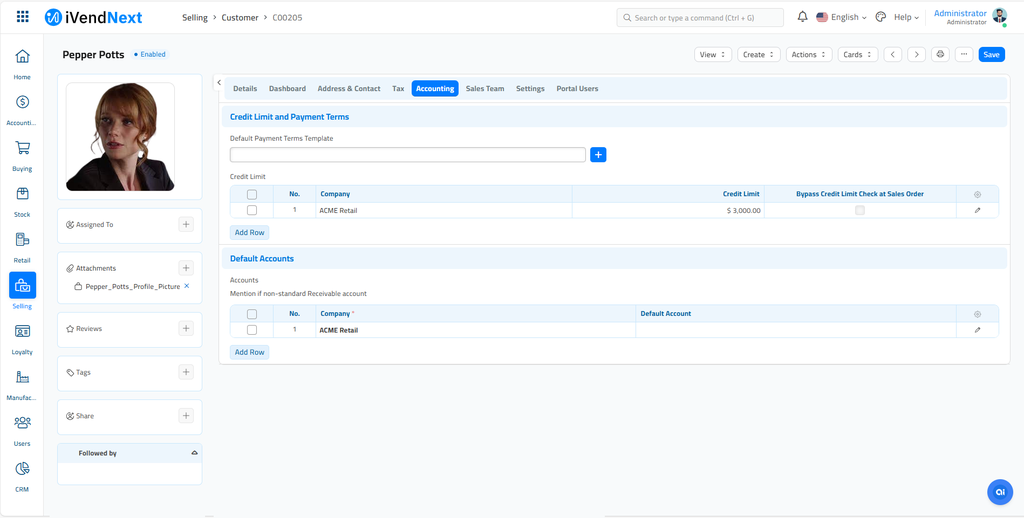
In order to understand the concept of On Account payment, we will consider the below customer who has a credit limit of 3000 in his account.
Steps to perform a POS Transaction using On-Account Payment in iVendNext
The steps to perform a POS transaction using On-Account payment in iVendNext are as follows:
1. Log in to the POS Terminal:
Ensure you are logged into the iVendNext POS terminal with the appropriate credentials.
2. Initiate a Sales Transaction:
Start a new sales transaction by scanning the items or manually entering the item details.
3. Add Customer Information:
Select or add the customer who has a credit limit. This is crucial for On Account payments, as it links the transaction to the customer's account.
Initially when you open the Transaction Screen, a Walk-In Customer (also known as a Cash Customer) is automatically selected. To attribute the sale to a specific customer, you need to add that customer's details to the transaction.
4. Proceed to Checkout:
Click the "Checkout" button on the transaction screen to move to the payment options.
5. Select the Payment Method:
Choose On-Account as the payment method. This option allows the transaction amount to be billed to the customer's account rather than requiring immediate payment.
6. Specify Payment Amount:
Enter the amount charged using the On Account option. Ensure that this amount does not exceed the customer's credit limit. If it does, you should use another payment method for the remaining amount.
You can use the On Account payment type to cover the entire transaction amount, provided your credit limit balance is sufficient. However, if the total transaction amount exceeds the credit limit, you must pay the remaining balance using a different payment method.
7. Complete the Transaction:
Confirm the payment details, then click the "Save" button to finalize the transaction. The amount billed will be recorded as an outstanding balance on the customer's account.
8. Print Receipt (Optional):
You may print a receipt for the customer. The receipt will include the transaction details and the On Account amount charged to their account.

Take AR Payment
Pepper Potts brought some items and paid using On Account. The amount equivalent to the sale amount was recorded as a receivable on the customer's account and is deducted from his credit limit. Now she came back to the store to settle his outstanding balance.
Steps to collect AR Payment
The steps to collect AR Payment in iVendNext are as follows:
1. Add Customer Information:
Add the customer to the Transaction Screen. This is crucial for On Account payments, as it links the transaction to the customer's account.
2. Take Advance Payment:
Click the Customer Operation button on the Transaction Screen and then click the Advance Payment button. This should take you to the Take AR Payment/Advance Payment Screen.

The Take AR Payment/Advance Payment Screen shows the Transaction Number, Transaction Date, AR Total amount, AR Balance amount, and Balance Total. This screen will also list all the transactions with outstanding balance. You have the option to decide whether to make the payment in full or partial.
3. Select AR Transaction Row
Select the desired AR Payment/Advance Payment transaction and specify the payment amount in the "Pay Amount" box. This is the amount that you want to pay against the outstanding balance. You have the option to decide whether to make the payment in full or partial. Click Ok to return to the Transaction Screen.

4. Receive Payment
Select your preferred payment method to receive the payment and conclude the sale.
Conclusion
On Account payments in a point of sale (POS) system offer significant benefits to customers by allowing them to make purchases on credit and the flexibility to pay later. This leads to increased sales, improved customer loyalty, and better cash flow management for businesses.