
Installing and updating
Retail Extensions · checked 2026-10-18
You add an app to your site from its card in the App library. iVendNext shows you what the app will change, and it installs the app only after you accept. This page covers the steps, the app's record under Extension Packages, and how an update and Connect again work.
Adding an extension
- In Desk, search for App library and open it. Only a user with the System Manager role can open it.
- Find the app under Ready to add. Open What it does and what you set up first on its card. It tells you what the app does and how to set it up. The card's facts line tells you who can use it and the outside addresses it may call.
- Press Install. If the app needs a key first, press Get a free key or Enter your key instead.
- A window opens, titled Install and the app's name. It lists what installing the app changes. Read the list. Tick the box "I agree to everything above and to the exact wording", and press Install. The button stays off until you tick the box.
- The card reads Installing… This can take a minute., then Installed · version and the version. A message, the app's name and is installed., appears, with Open when the app adds a page to Desk.
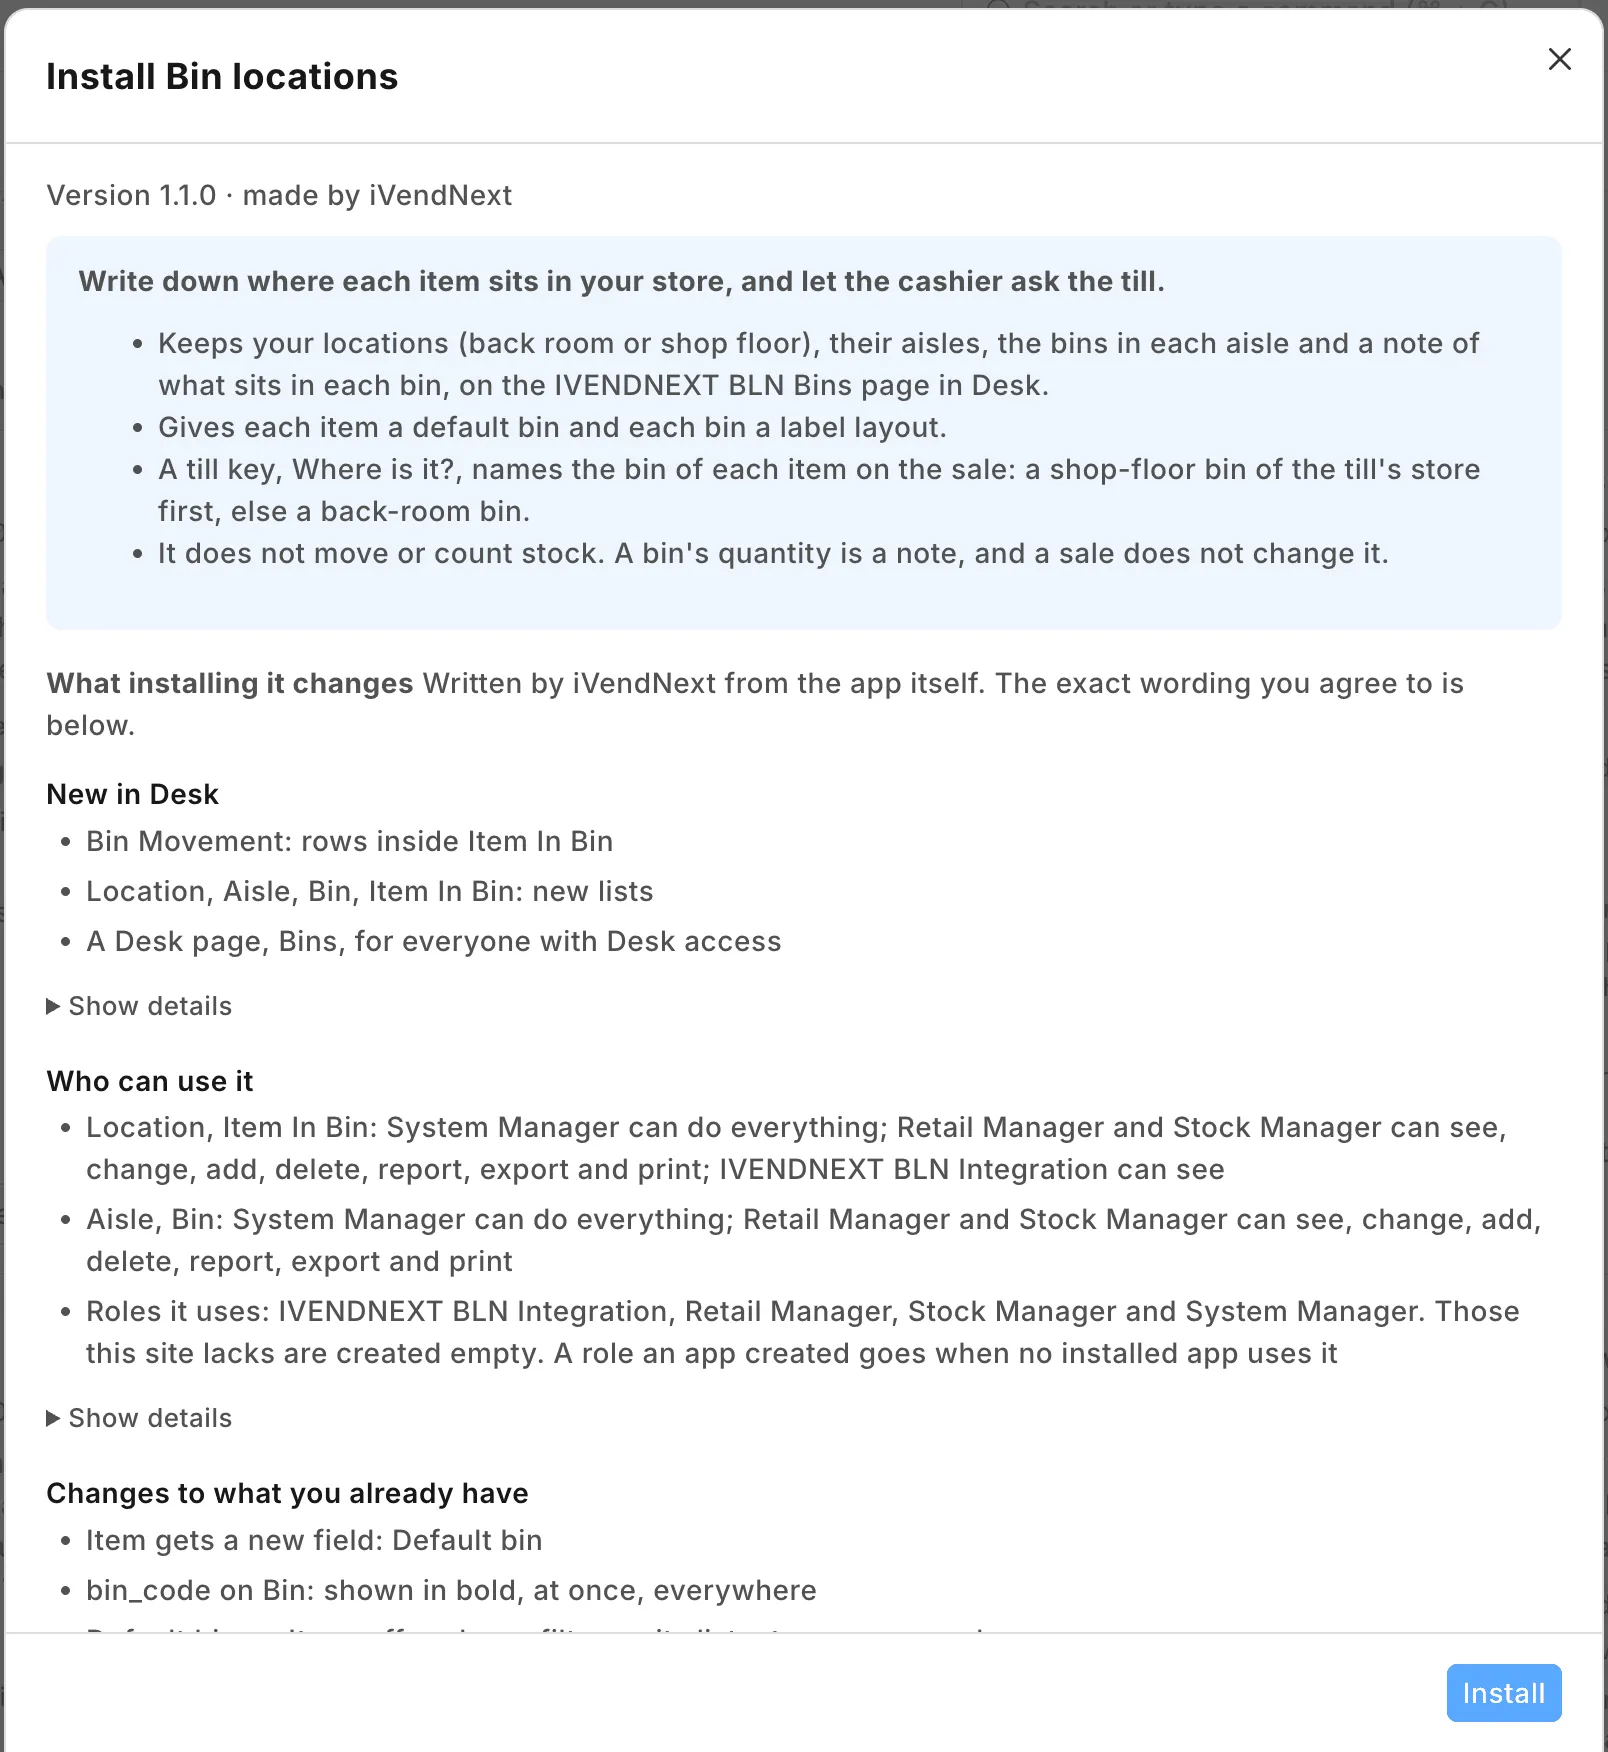
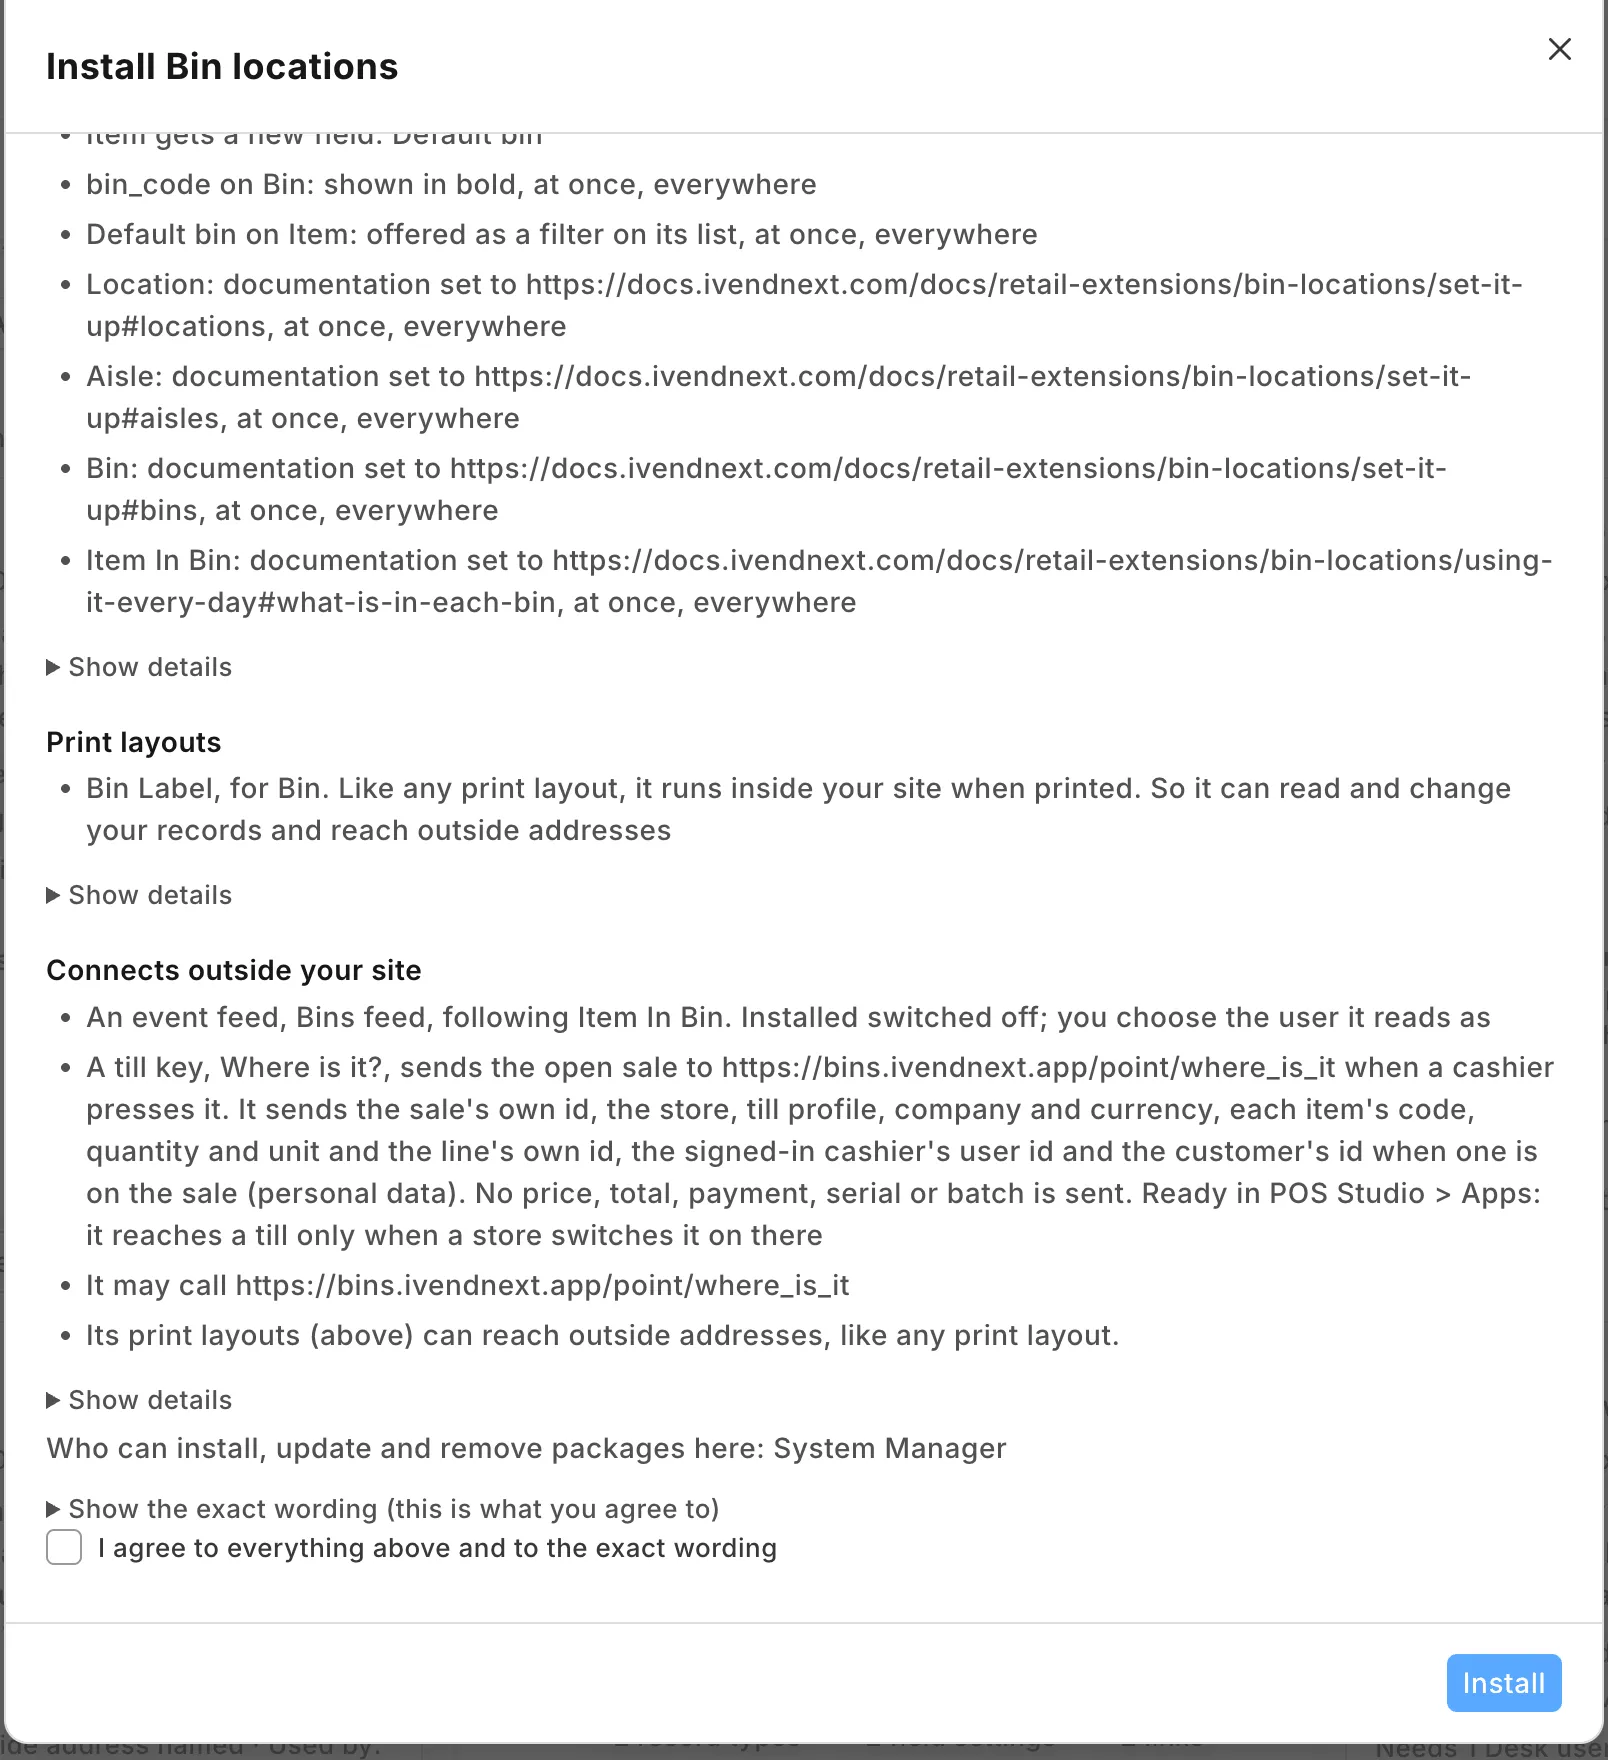
The window starts with the version and the maker, and a short summary of what the app does. Under What installing it changes, it lists what the app changes under five headings: New in Desk, Who can use it, Changes to what you already have, Print layouts and Connects outside your site. Some apps also list What it needs from you after installing, which is what you do next. Press Show the exact wording to read the exact text you accept. A key stays with the app's record, so an update needs no new key while the key works.
The record of an app
Press Details on an installed card. The record is under Extension Packages, one record for each version of an app. Its title is the app's title, and its id is the app's name and version. The line at the top says which roles can install, update and remove apps on your site.
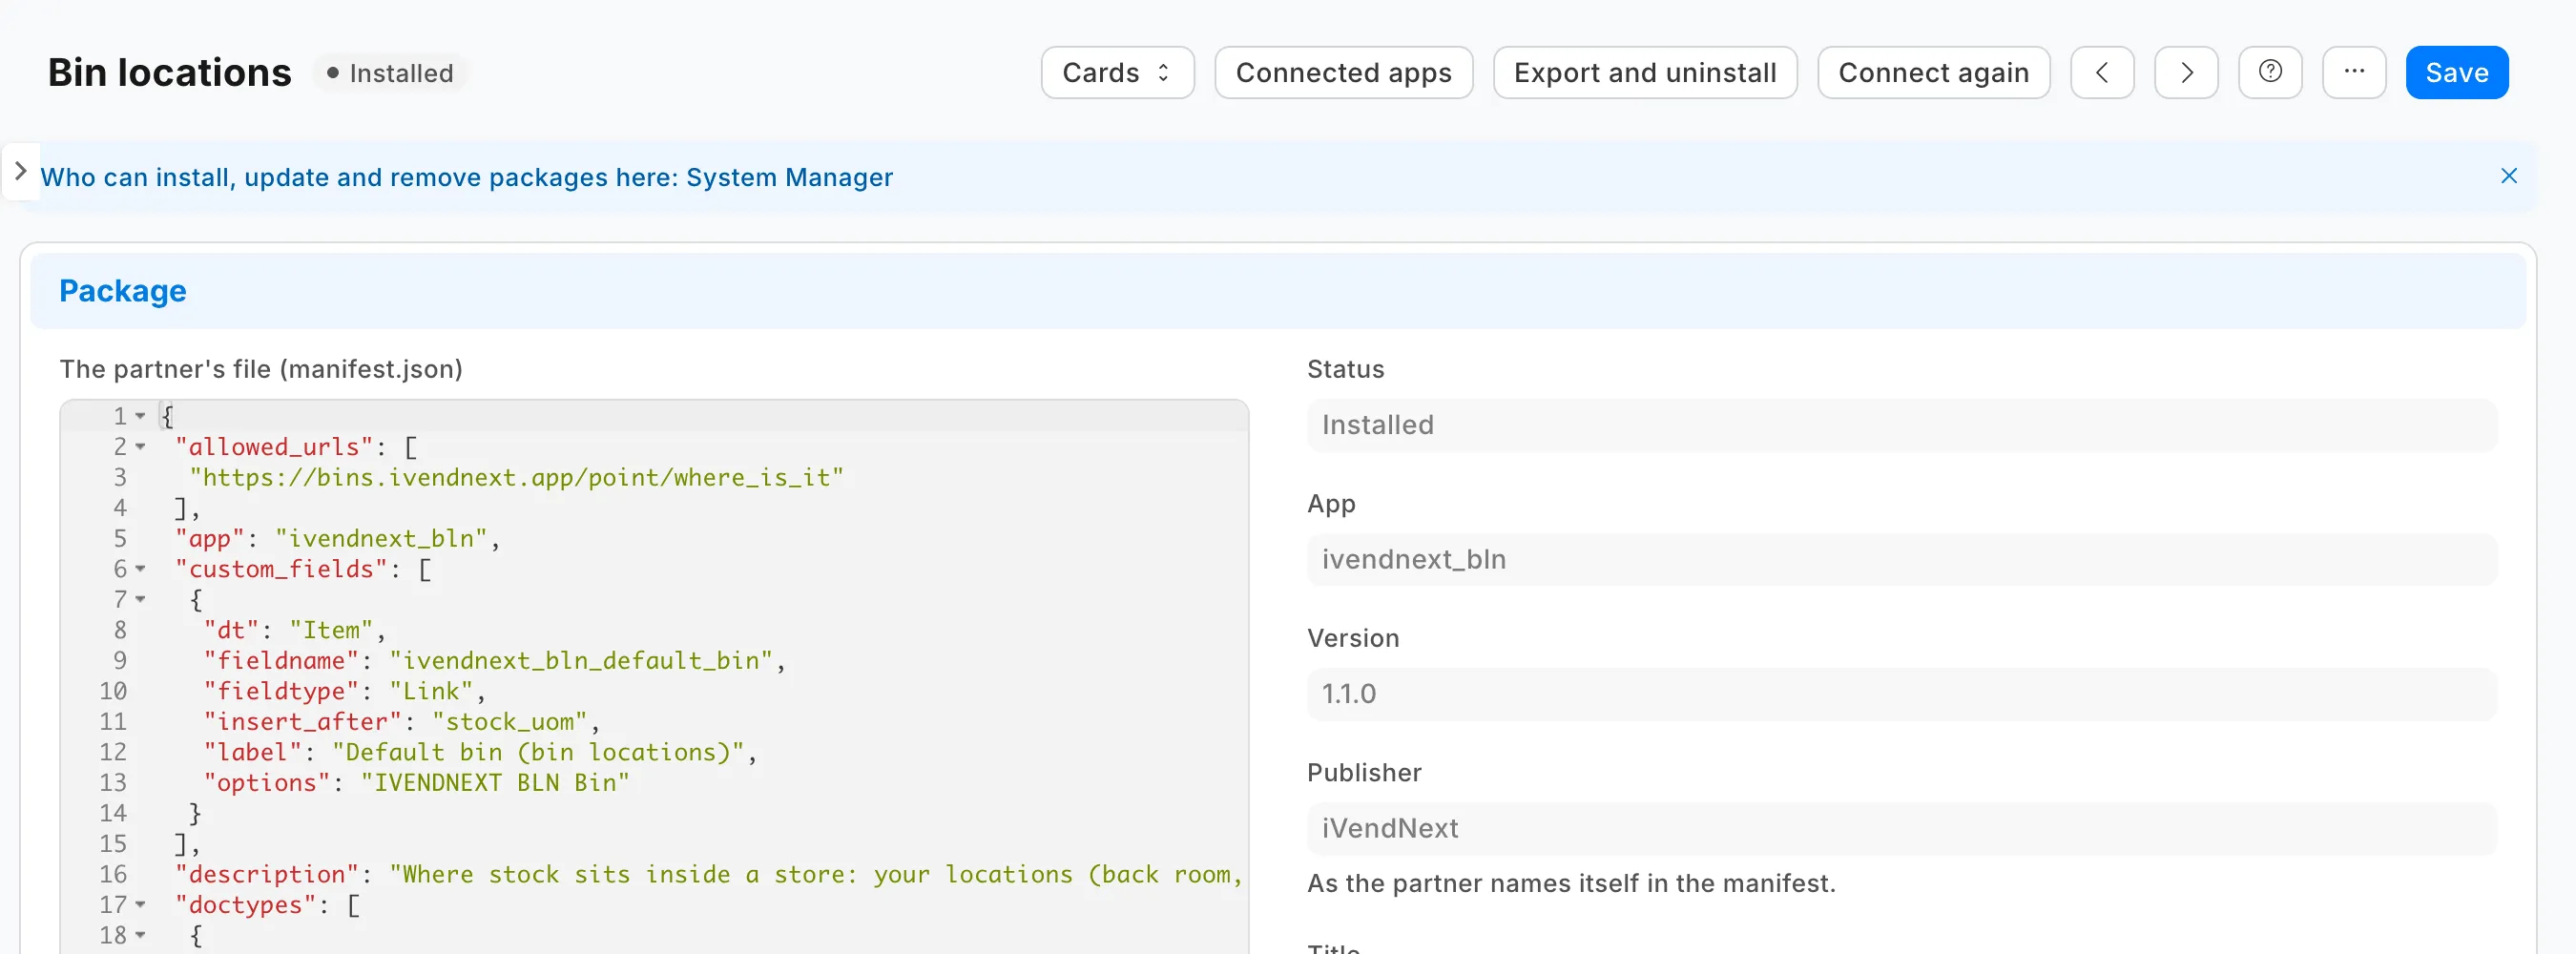
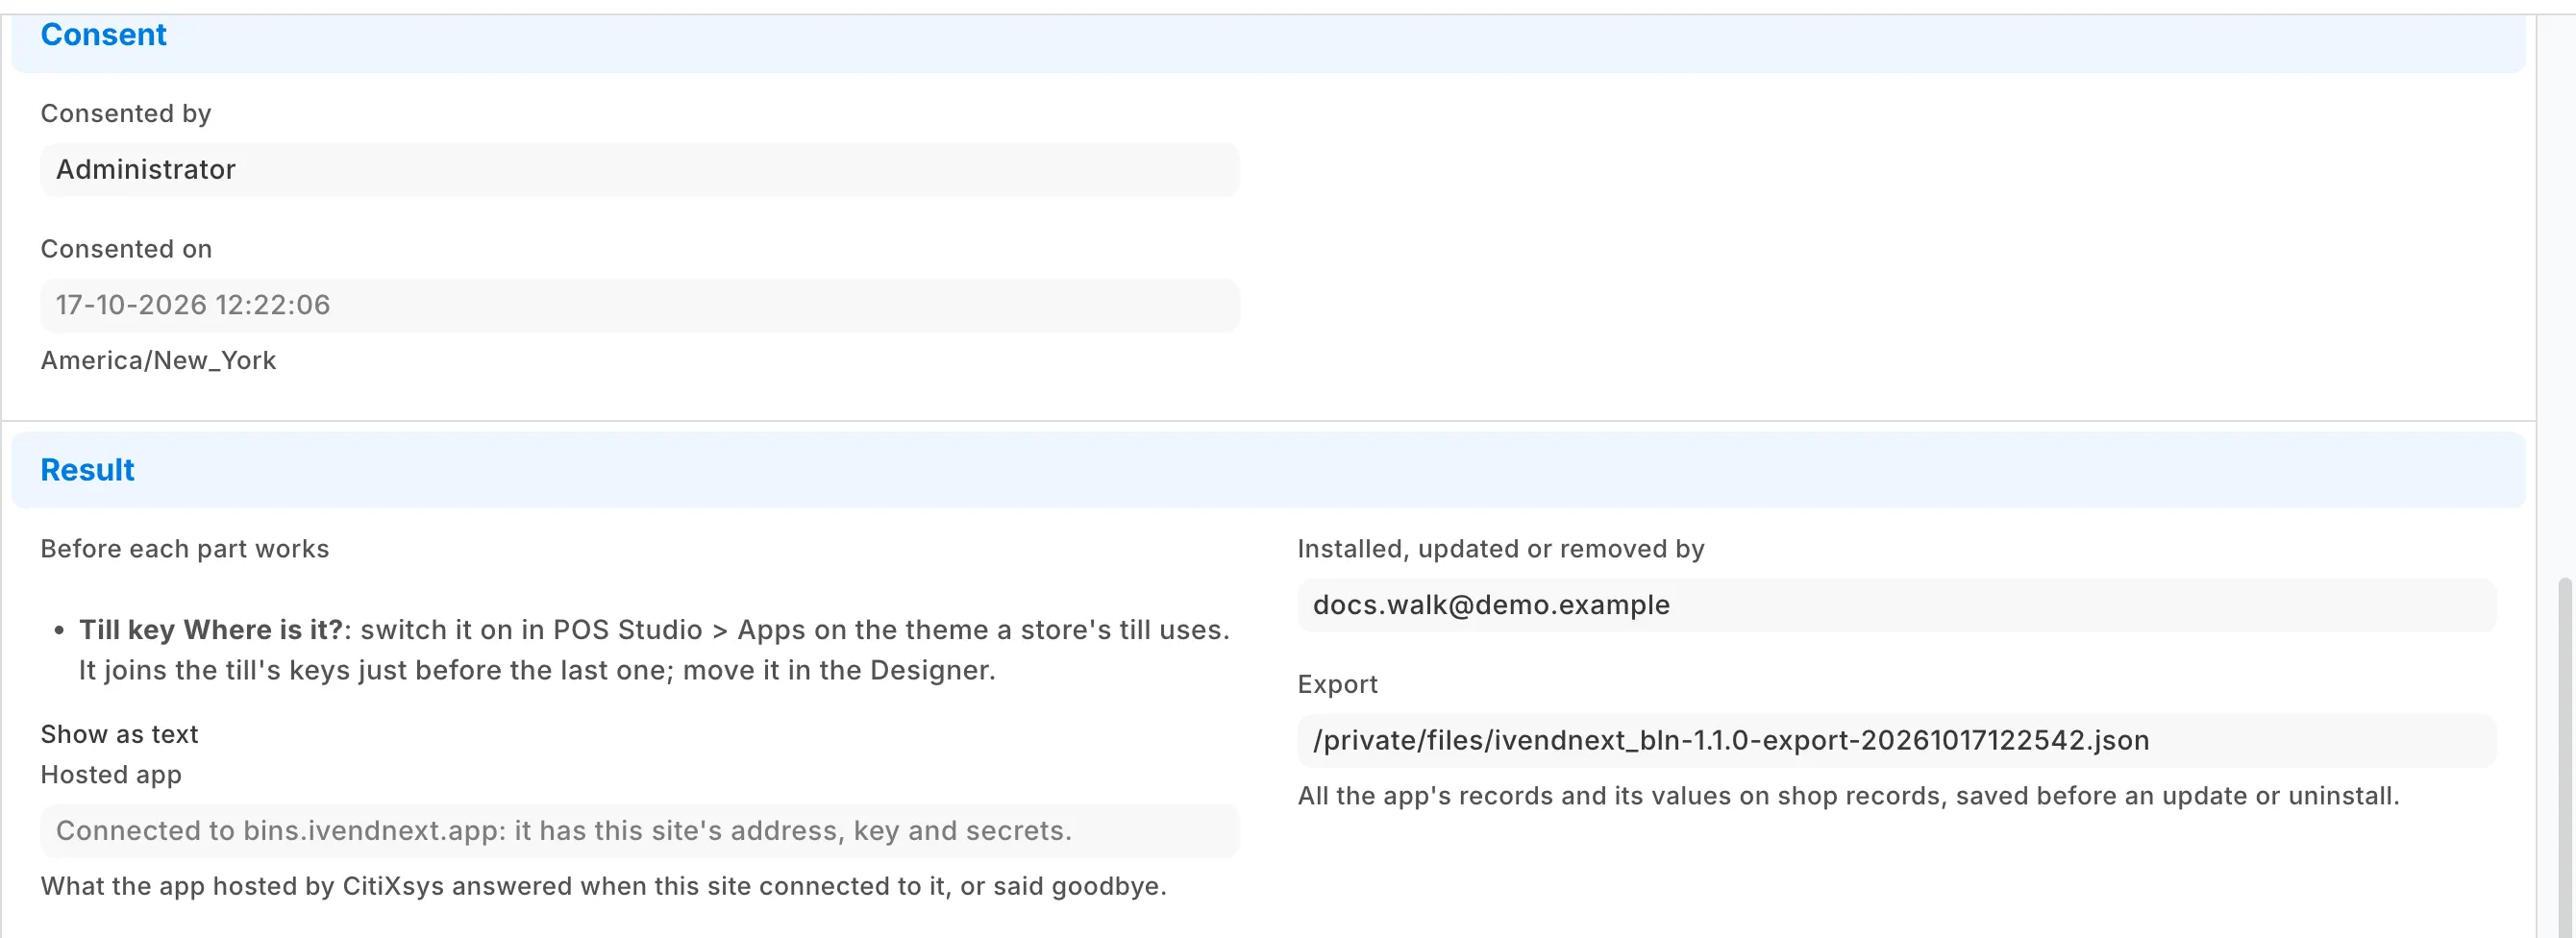
| Part of the record | What it shows |
|---|---|
| Package | The app's file, its Status, its Version, who made it (Publisher), its Name prefix and the last action. |
| Check | Refused because, when iVendNext cannot install the app. What it will do, which iVendNext writes from the app's file. What changes from the installed version, on an update. |
| Consent | Who accepted the install, and when. |
| Result | What went wrong, Before each part works, Hosted app, who installed, updated or removed the app, its Export file, and Undo not finished. |
| For your records | Fingerprints of what you accepted and the key the version was installed with. |
Status is one of Draft, Refused, Checked, Queued, Installing, Installed, Upgrading, Upgrade Failed, Failed, Superseded, Uninstalling or Uninstalled. Connected apps at the top of the record opens the report of Connected apps.
Before each part works lists what you still switch on. A service the app brings arrives switched off, and each needs your own consent: see Turning on a service or a check. A till key is the exception. Your consent to the install is its consent, and the key is ready in POS Studio, under Apps. A store switches it on there.
Updating an app
When a newer version is listed, the card reads Version and the number, then is ready, and has Update. Press it. The window is titled Update and the app's name, and it shows What changes, then What the new version does. Accept and press Update.
An update adds what is new and changes the app's own records in place. It switches off every service that changed, and you consent to each again. It removes nothing. A failed update undoes only its own changes. The record shows Upgrade Failed, and the version you had keeps running. When an update finishes, the earlier version's record shows Superseded.
Connect again
Some apps run a service that CitiXsys hosts. After the install, your site connects the app to its service. The Hosted app field says what the service answered. On an app like this, the record has Connect again. When the service could not be reached, or you made a key for the app's user after the install, press it. The record then says that it sent the key.
Connect again sends the secrets the record already has. If a secret leaked, make a new secret first, on its own record. Then press Connect again twice, because the app keeps the old secrets for one connect.
When an install does not finish
If the status stays at Queued, Installing or Upgrading, or it shows Failed, press Finish on the record. A failed install takes back what it made, and Finish removes anything left. The record says what went wrong in What went wrong.