
Use these screens for stock you already have that needs to go somewhere else. A transfer goes between stores in three steps. Stock management takes stock out, brings it in, or moves it in one step. To post means to send your work to iVendNext, so that it becomes a stock record.
Transferring stock between stores
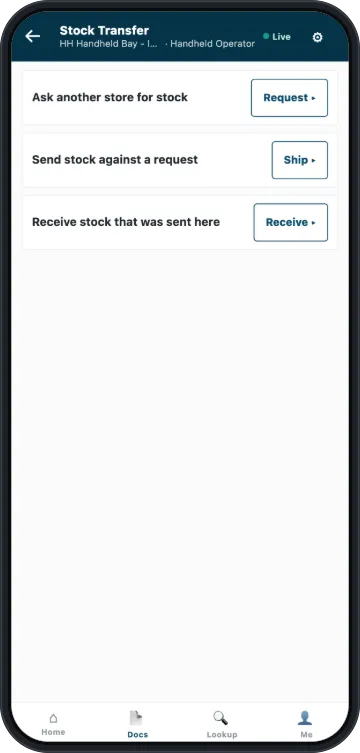
A transfer has three steps, usually on two devices. On Home, tap Stock Transfer, then pick the step.
Your site must have Use Inter Store transactions on. If it is off, the screen says "Moving stock between stores is switched off here", and a manager can turn it on.
Asking another store for stock
You do this at the store that needs the stock.
- Tap Request.
- Under Request stock FROM, select the store you are asking.
- Set Required by. The request cannot be saved without it.
- Scan or search for each item, and set the quantities.
- Optionally, add a reason under Comments. The other store sees it.
- Tap Save request.
A request moves nothing. It asks for the stock, and it carries no serial or batch numbers.
A transit location cannot ask for stock. If your device is set to one, such as Goods In Transit, switch it to a store first. If you start a request and then switch store, the request stays in Docs.
Sending the stock
You do this at the store that was asked.
- Tap Ship.
- Scan the request's barcode, or find it in the list.
- Scan what you are sending. Each line shows what was asked for and what you can still send. A scan over that amount is refused on the row.
- For a tracked item, one you track by serial number or by batch, enter its serial or batch numbers.
- Tap Save shipment.
The stock now sits in transit until the other store receives it. You can send less than was asked for, and the rest stays on the request.
Receiving the stock
You do this at the store the stock was sent to.
- Tap Receive.
- Scan the shipment's barcode, or find it in the list.
- Scan what arrived. A line cannot take more than was sent, apart from any allowance your site has set.
- For a tracked item, scan the serial numbers or choose the batches that arrived. The screen offers what was sent.
- Tap Save receipt.
The store it goes to comes from the request, so you do not choose it again.
If a shipment or its receipt was wrong, do not send the stock back as a new movement. A manager cancels it. See Correcting a posted document.
Using Stock management
On Home, tap Stock management, then pick the job. Each job posts one stock movement.
Taking stock out
Use Issue for damage, shrinkage or internal use.
- Tap Issue.
- Optionally, write why under Comments. The back office sees it on the entry.
- Scan or search for each item.
- For a tracked item, enter its serial or batch numbers.
- Tap Save issue.
Bringing stock in
Use Receive for goods that arrive with no purchase order.
- Tap Receive.
- Scan or search for each item.
- Tap a line to change its quantity or its price. If you leave the price blank, iVendNext works it out. A negative price is refused. If the item has no value on file, the screen asks you to enter one.
- Tap Save receipt.
If Print labels after receiving is on, this receipt also adds shelf labels to the print list.
Moving stock straight to another store
- Tap Move.
- Choose From store and To store. They must be different stores.
- Scan or search for each item.
- For a tracked item, enter its serial or batch numbers.
- Tap Save move.
The stock arrives straight away, and nothing sits in transit.
Undoing a movement after you post
An issue, a receipt or a move has its own way to undo it. See Correcting a posted document.